Christmas ornaments are the best small job a CNC router does all year. They use offcuts, they carve in well under an hour, a board of them comes off the machine at once, and every one of them ends up on a tree that somebody photographs. They are also the easiest thing to sell at a craft fair in November, because nobody needs convincing that they want one.
They are not just small wall panels, though. A relief that looks crisp at 12 inches can turn to mush at 3, the hanging hole goes in the wrong place, and the cut-out breaks the delicate bits off. This guide covers what changes when you carve small: the size and depth that hold detail, the wood, the bits, how to carve a whole board of them in one go, and the finishes that turn plain wood into something people buy.
In this guide
- Size and depth: what holds detail at 3 inches
- The best wood for carved ornaments
- Bits and toolpaths
- Carving a whole board at once
- The hanging hole
- Finishing: oiled, painted or gilded
- Ornament designs worth carving this year
- Carving them to sell
- Questions people ask
Size and depth: what holds detail at 3 inches
Most hanging ornaments end up between 3 and 4½ inches on their longest side. Smaller than 3 inches and faces stop reading from across a room; bigger than 5 and they pull the branch down. Tall "tag" designs like the Drummer Boy Nutcracker CNC Relief STL look best at about 2 by 4 inches, round and square designs at 3 to 3½ inches across.
Depth matters more than size. On a wall panel you might give a relief 6 or 8 mm of depth; on an ornament, 2.5 to 4 mm is plenty. A shallow relief keeps the stock thin, so the ornament stays light, and it stops the tiny raised parts (a sword tip, a reindeer's leg) from standing so proud that they snap off when it is handled. Set the depth when you import the STL: in VCarve or Aspire you size the model, then type the depth you want rather than accepting the file's default. Our guide to scaling STL files for CNC walks through it.
- Stock: 1/4 to 1/2 inch (6 to 12 mm). 3/8 inch is the sweet spot: stiff enough to survive a toddler, light enough for a thin branch.
- Relief depth: 2.5 to 4 mm, leaving at least 3 mm of solid wood under the deepest point.
- Back: leave it flat. It is where the name and the year go, which is what makes an ornament a keepsake.
The best wood for carved ornaments
Ornaments are where offcuts earn their keep, but not every offcut is equal at this size. Detail that a big panel forgives, a 3 inch ornament shows.
- Hard maple: the best all-rounder. Pale, very fine grain, holds the smallest details crisply and takes paint beautifully.
- Cherry: warm and rich with clear oil alone, and it darkens to a lovely red-brown within a year. Ideal for natural-wood ornaments.
- Walnut: deep brown, very elegant for nativity and star designs, and gold leaf looks wonderful against it.
- Basswood: soft and easy to paint, but the fine detail comes off slightly fuzzy. Good for painted ornaments, less so for natural ones.
- Avoid plywood for relief: the carving goes through the top veneer and exposes the glue line. It is fine for flat cut-out shapes, not for a relief face.
Our best wood for relief carving comparison shows the same design in eight species if you want to see the difference side by side.
Bits and toolpaths
At ornament size the finishing bit does almost all of the work, so it is the one that matters.
- Finishing: a 1/16 inch tapered ball nose at about 8 to 10 percent stepover. It renders faces, buttons and reindeer legs that a 1/8 inch ball smears together. Our tapered ball nose guide explains the tip sizes, and the stepover calculator shows the ridge height you will get.
- Roughing: at 3 mm of depth you can often skip it, or run a quick 1/8 inch pass on a whole board of ornaments to take the bulk out before the fine bit goes in.
- Cut-out: a 1/8 inch downcut end mill gives a clean top edge. Add four small tabs, about 1/8 inch wide, so the ornaments do not come loose and get chewed up on the last pass.
A single 3 to 4 inch ornament typically finishes in somewhere between 15 and 45 minutes on a hobby machine, depending on the design and your feed rate. Put the real file and your bit into Will it cut? for a proper estimate before you commit a Saturday to it.
Carving a whole board at once
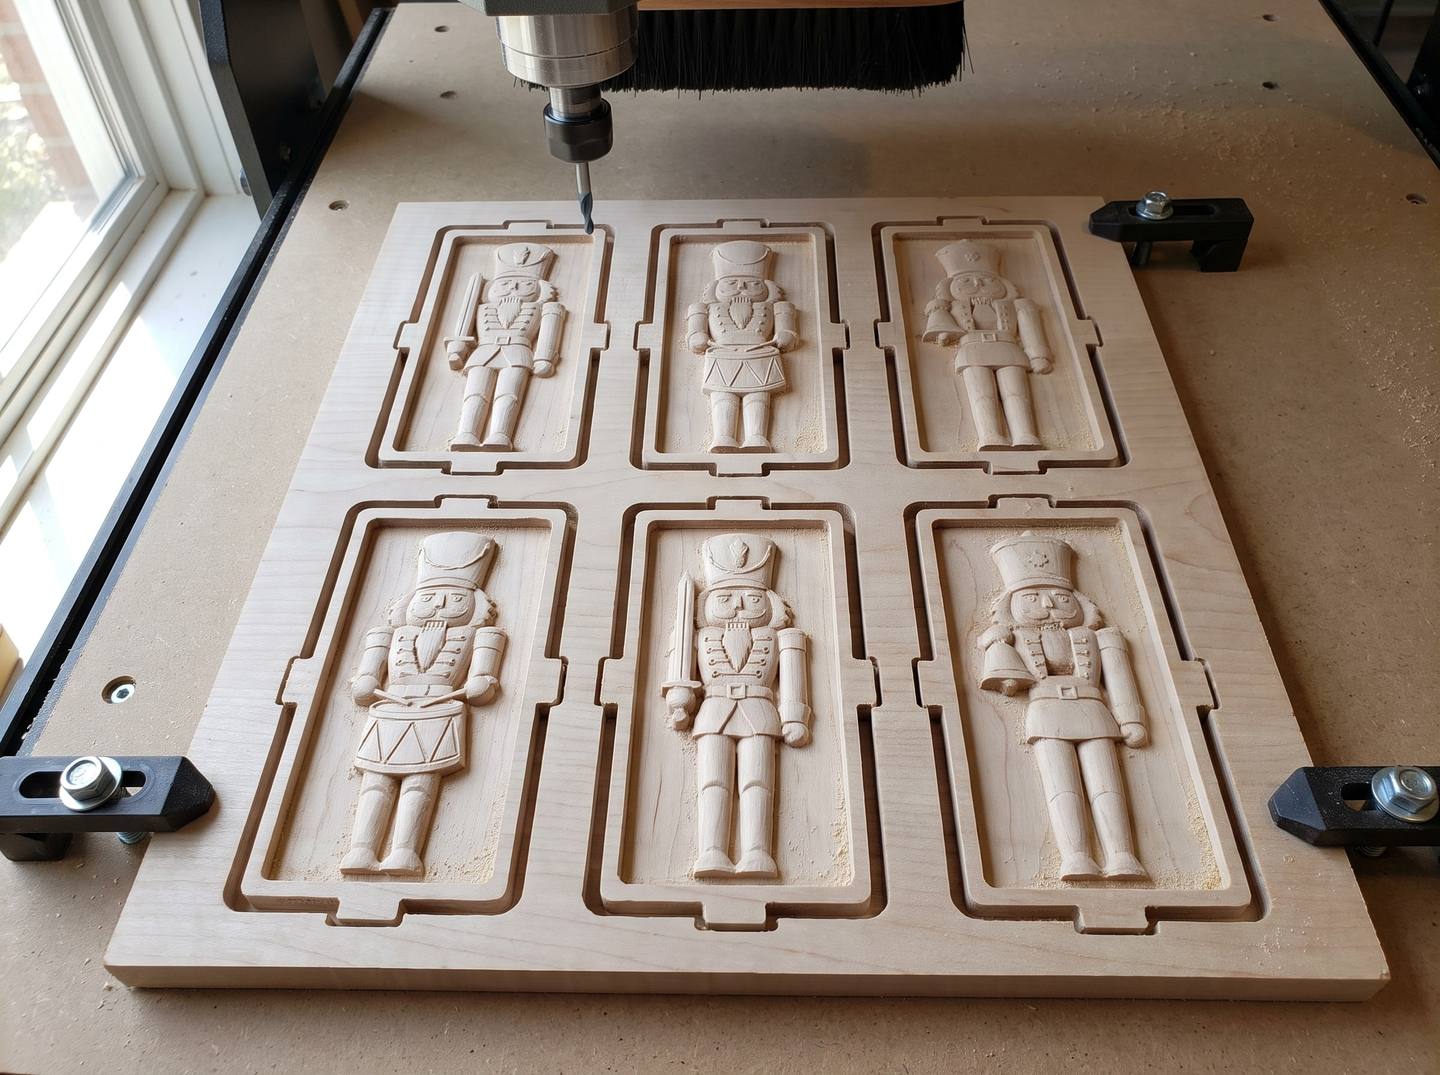
This is where ornaments become worth the effort. Lay out six to twelve on one board, leaving about 1/2 inch between them for the cut-out bit and the tabs.
- Import once, copy many. Size and set the depth of the first one, then copy it into a grid. Different designs on the same board are fine, as long as they share a depth.
- Group the toolpaths by bit. Run every roughing pass, then every finishing pass, then every cut-out. Two bit changes for the whole board.
- Surface the board first. If the stock is not flat, a 3 mm relief will be deeper on one side than the other. A quick surfacing pass fixes it.
- Snap and sand. Break the tabs with a chisel, then take the tab nubs off with a sanding block.
Every design in our shop includes commercial use, so one file covers a whole board, a whole season, and every fair you take them to.
The hanging hole
Tag-style designs such as the nutcracker set already have the hole drawn in. For the others, add it yourself: a 3/16 inch (4 to 5 mm) hole about 1/4 inch in from the top edge, centred on the ornament's balance point so it hangs straight. Cut it as part of the cut-out toolpath or drill it afterwards. Thread a narrow satin ribbon, red cotton twine or a brass ornament hook through it.
Finishing: oiled, painted or gilded
First, clean up the fuzz. A brass brush or a stiff nylon brush takes the raised fibres out of the detail far better than sandpaper, which rounds the edges you just carved.
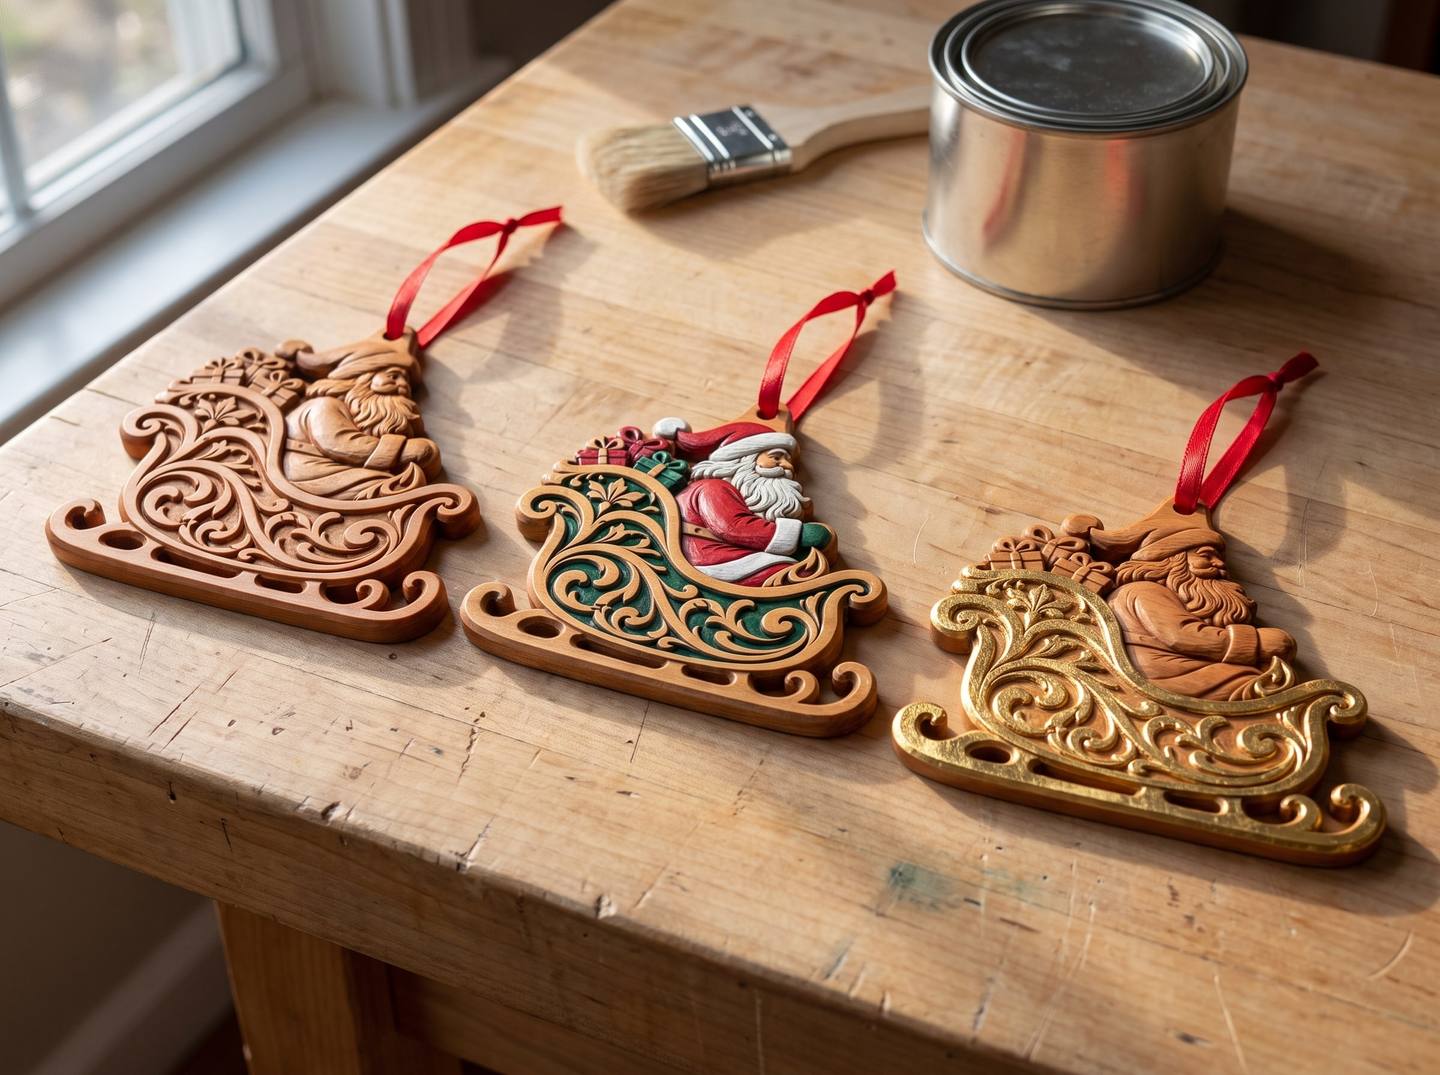
- Natural: wipe on a coat of Danish oil or a thin oil-based finish, let it soak, wipe off the excess. Two coats on cherry and walnut and the carving glows.
- Painted: seal first with a thin coat of shellac or sanding sealer, then acrylic craft paint with a small brush. Base colours first, then dry-brush a lighter shade over the raised areas to bring the detail out. Our guide to colouring a relief carving covers the full method.
- Antiqued: brush a dark glaze into the recesses and wipe it off the high points. It makes a natural-wood carving read like an heirloom.
- Gilded: imitation gold leaf on the star, the halo or the sleigh's scrollwork, over gilding size. A little goes a very long way.
Finish with a light coat of satin spray lacquer, especially on painted ornaments that will be handled every December. There is more on oils and glazes in how to finish a CNC relief carving.
Ornament designs worth carving this year
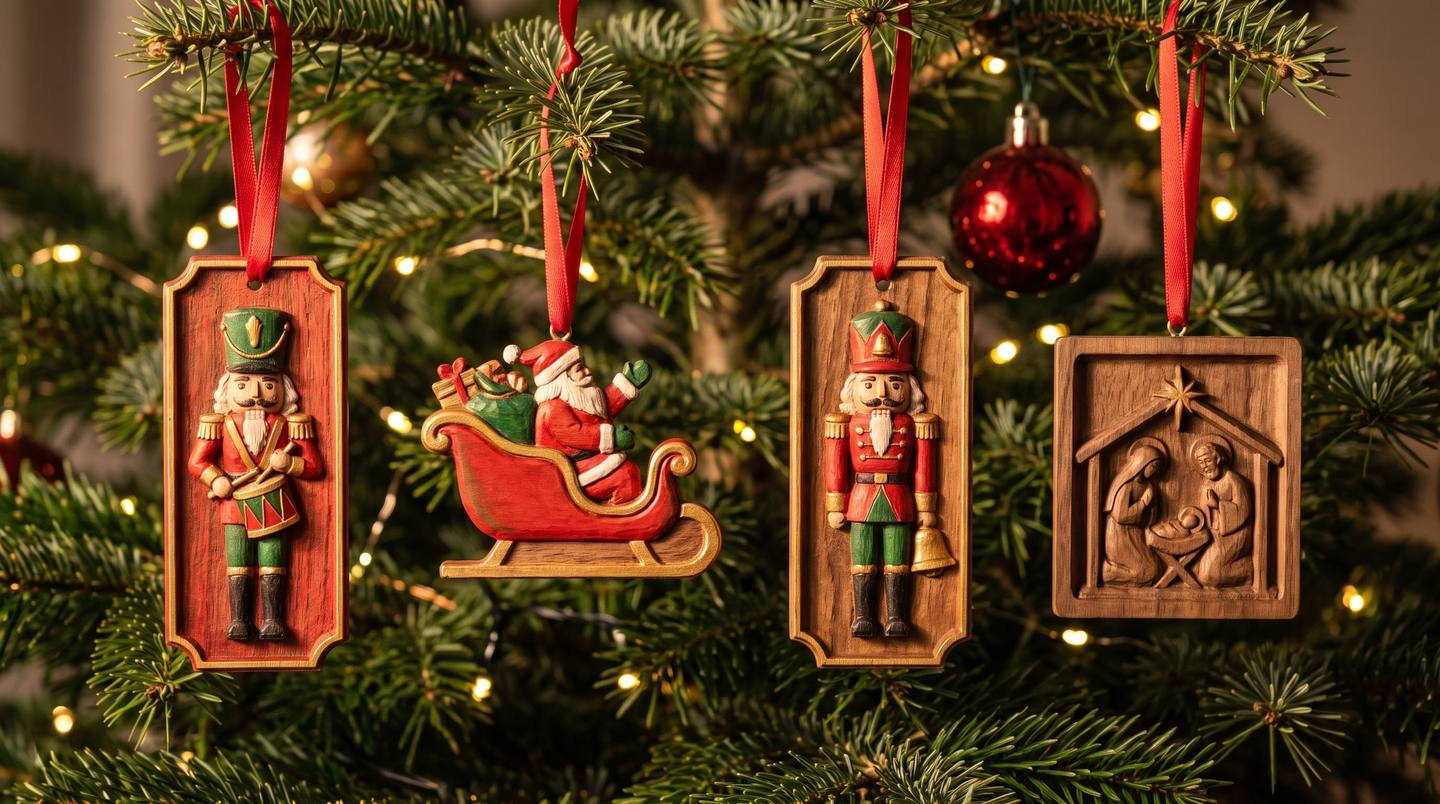
The nutcracker trio. Tall tag ornaments with the hanging hole already in place, made for a 2 by 4 inch blank: the Lunging Nutcracker Cavalry Swordsman CNC Relief STL, the Drummer Boy Nutcracker CNC Relief STL and the Dancing Nutcracker Bell Ringer CNC Relief STL. They look best painted in red, green and gold, and as a set of three they sell as a set of three.
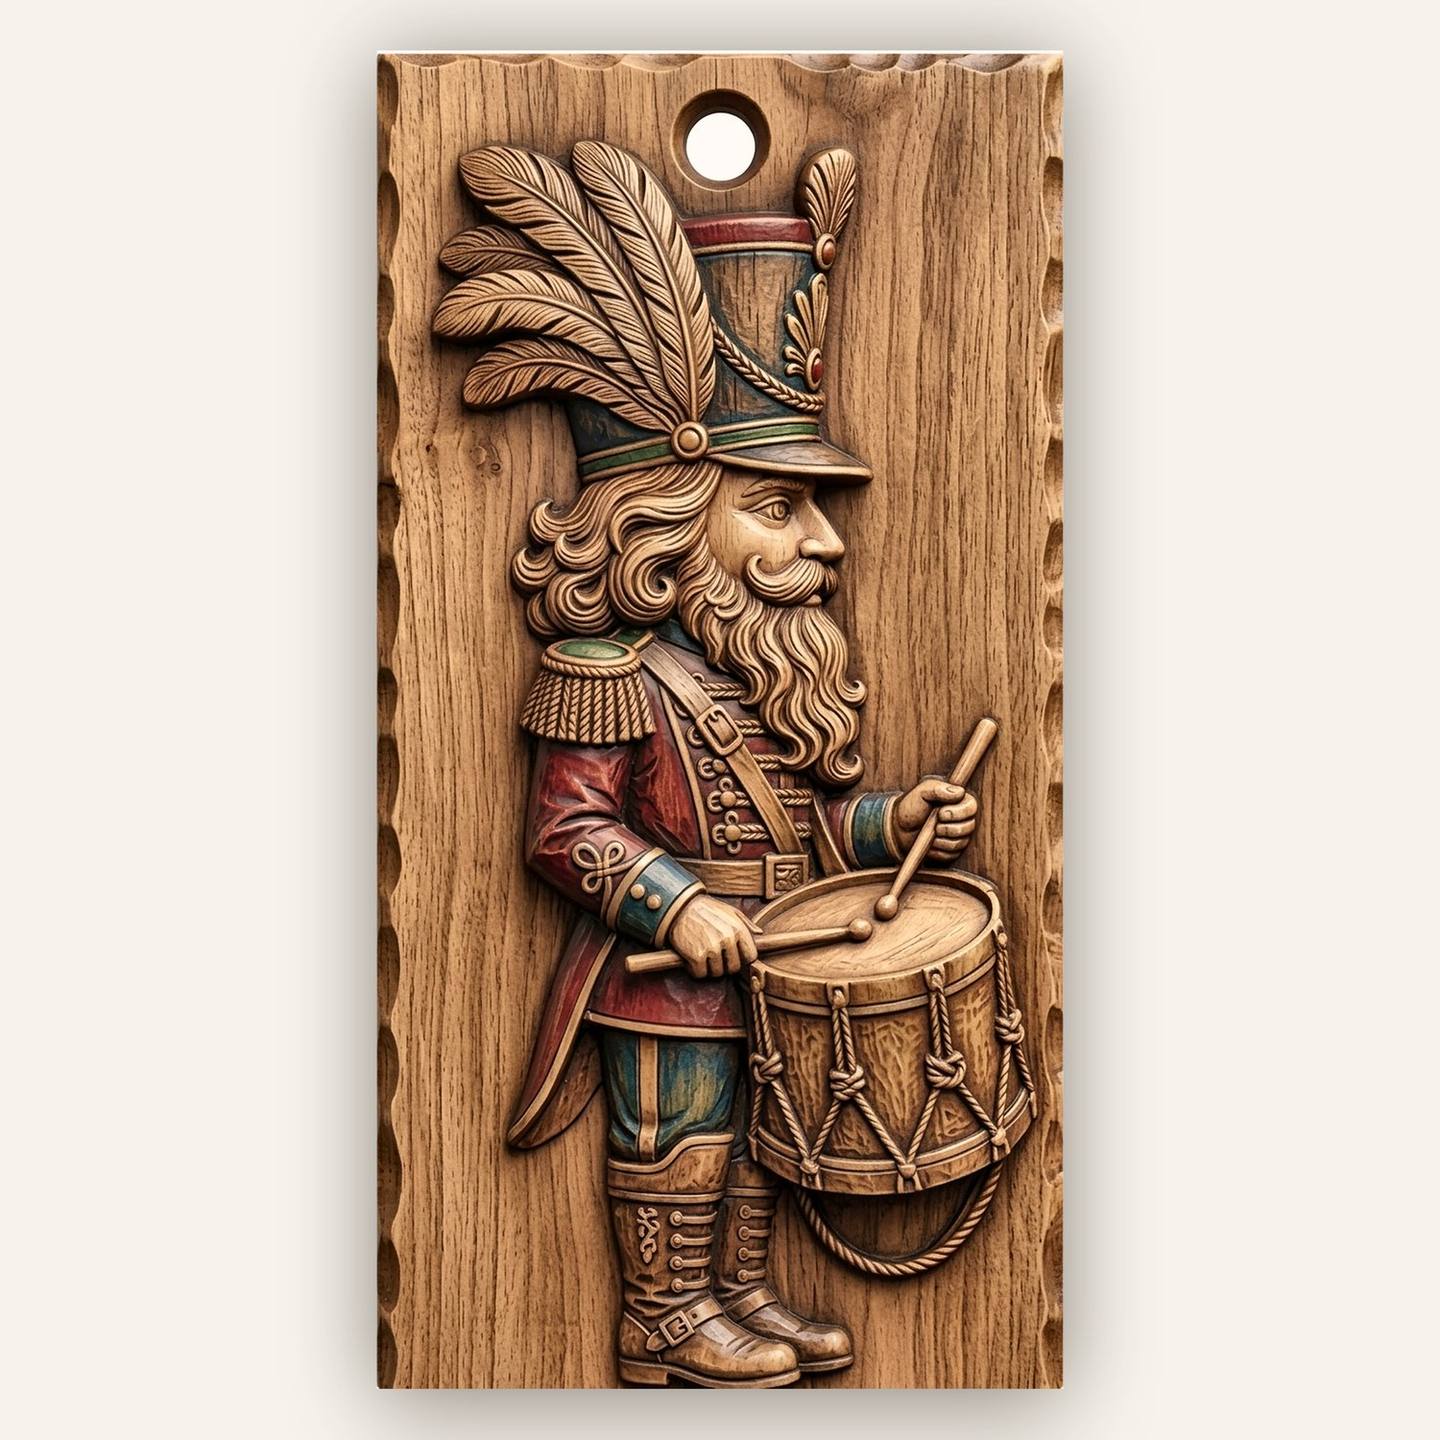
Get the Drummer Boy Nutcracker · $3.00
Santa and his sleigh. The Santa Claus Sleigh Ornament CNC Relief STL is the one people pick up first at a fair, and the longer Santa Sleigh Reindeer Ornament CNC Relief STL makes a lovely mantel or door piece at a bigger size.
The faith ornaments. The Holy Family Nativity Christmas Ornament CNC Relief STL and the Star of Bethlehem Ornament CNC Relief STL. Carve them in walnut or cherry and gild the star. If you carve for a church bazaar, these are the two to bring, and our guide to carving a nativity scene covers the bigger panels that go with them.
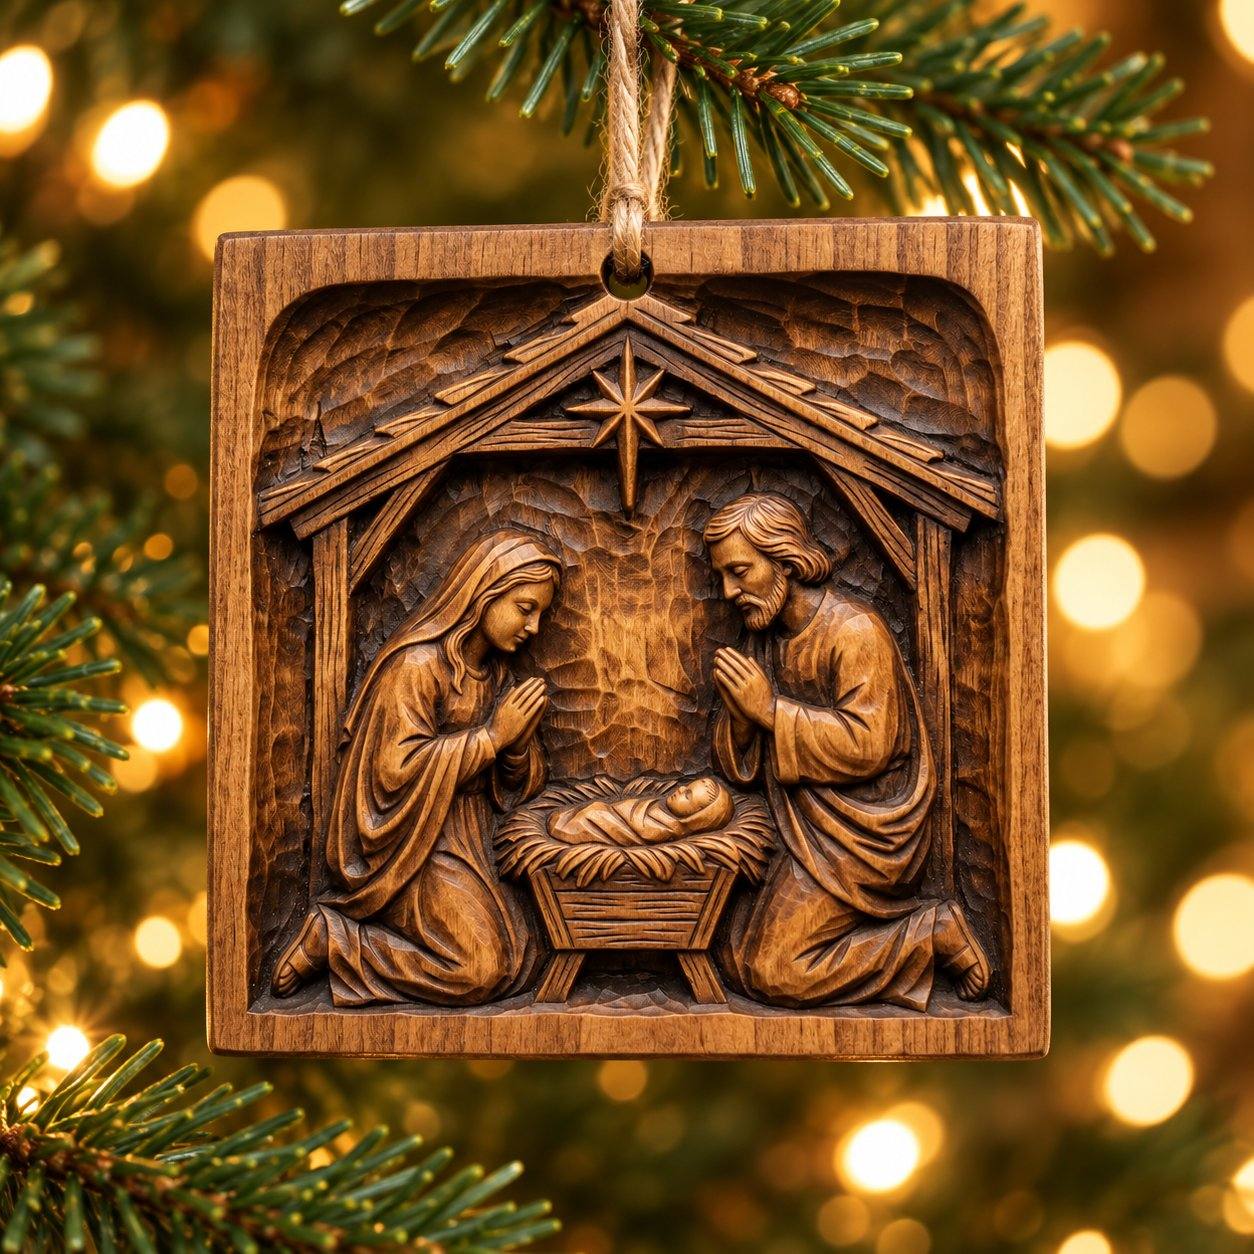
Get the Holy Family ornament · $3.00
The dog lovers. The Christmas Dog Breed Ornament Set CNC Relief STL is a ready-made set of breed ornaments. Add the dog's name and the year on the back and it becomes the gift people cry over.
Button art. Not ornaments but small enough to sit beside them: the Button Christmas Tree Decor CNC Relief STL and the Christmas Button Wreath CNC Relief STL are panels made to look like a pile of sewing buttons, and they come alive when each button gets its own colour. We wrote a whole guide to painting button-art Christmas carvings.
The whole Christmas collection has trees, wreaths, plaques, nativity scenes and serving trays as well as ornaments.
Carving them to sell
Ornaments are about as close to a perfect craft-fair product as wood gets: cheap to make, quick to carve, light to carry, and bought on impulse. A few things make the difference:
- Start early. Fairs run from mid-November to mid-December and online orders need posting by mid-December. Carve your stock in the first weeks of November, not the last.
- Personalise. A name and a year on the back turns a $3 file into a keepsake. A V-carve on the flat back or a quick laser pass both work.
- Sell sets. Three nutcrackers, a nativity ornament with its star, a pair of dogs. A set is an easier "yes" than a single.
- Price on your time, not the wood. The wood in an ornament costs very little. Work out your machine and finishing time per ornament and price from that, then check what similar carved ornaments sell for at your local fairs.
- Package them. A small kraft box, tissue and a ribbon makes a carved ornament a ready-made gift, and gifts are what people buy in December.
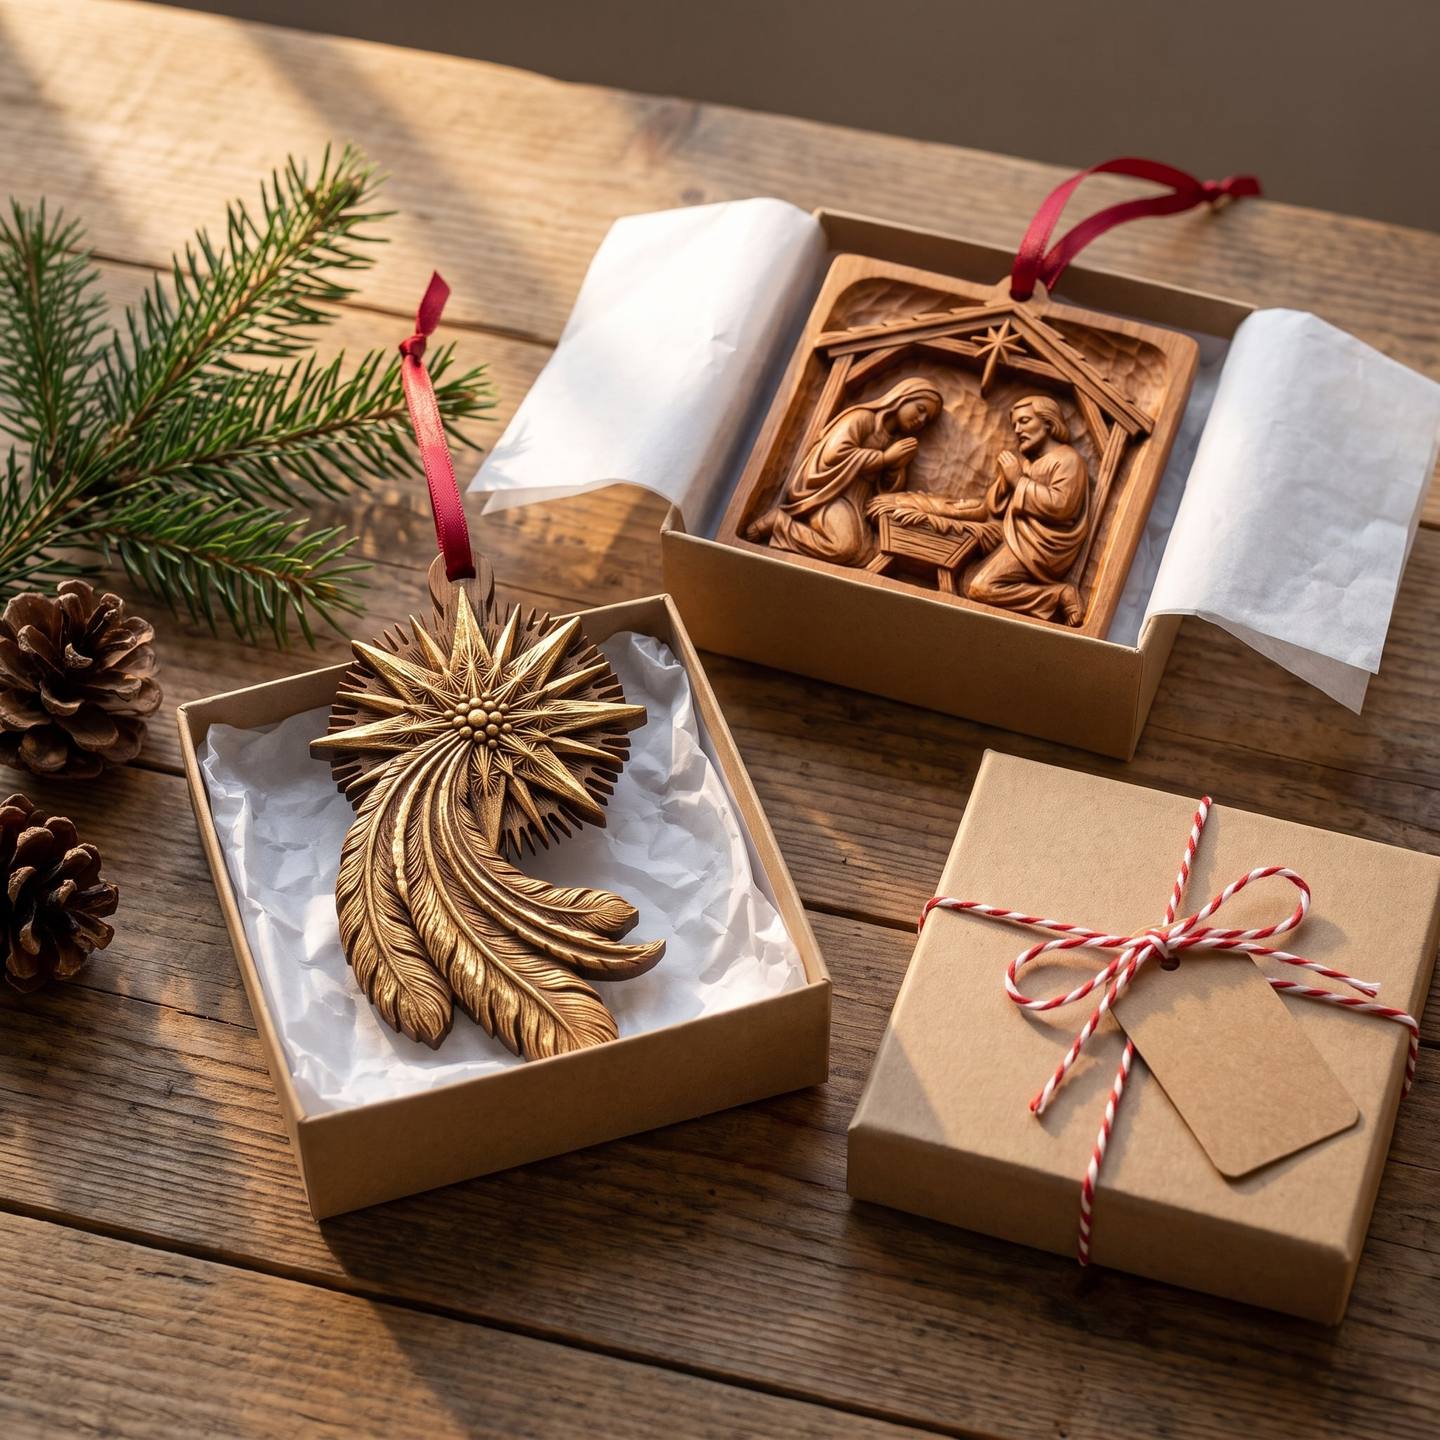
Our longer guide to selling CNC relief carvings covers pricing and where to sell in more depth. And if you have the files but not the machine, a Cut Local maker near you can carve them for you.
Questions people ask
Can I sell the ornaments I carve from your files?
Yes. Every design includes commercial use: carve as many as you like and sell the finished pieces. The only thing you cannot sell or share is the file itself.
What size should a carved ornament be?
3 to 4½ inches on the longest side, with 2.5 to 4 mm of relief depth on 3/8 inch stock. Tall tag designs work well at about 2 by 4 inches.
Which bit gives the best detail on small ornaments?
A 1/16 inch tapered ball nose at around 8 to 10 percent stepover for the finishing pass, with a 1/8 inch downcut end mill for the cut-out.
Can I 3D print these ornaments instead?
Yes. The same STL prints flat with no supports. Our guide to 3D printing a bas-relief STL has the settings, and the paint-and-dry-brush finish works on plastic too.
How long does one ornament take to carve?
Usually somewhere between 15 and 45 minutes on a hobby machine, less per ornament when you carve a whole board at once. Will it cut? gives an estimate for your exact file, size and bit.
Start with one board of nutcrackers. By the time the last tab is sanded you will know your depth, your feed rate and your finish, and every board after that is quicker. The full Christmas collection is waiting when you are.
Jolly, DigitalChiselCo