
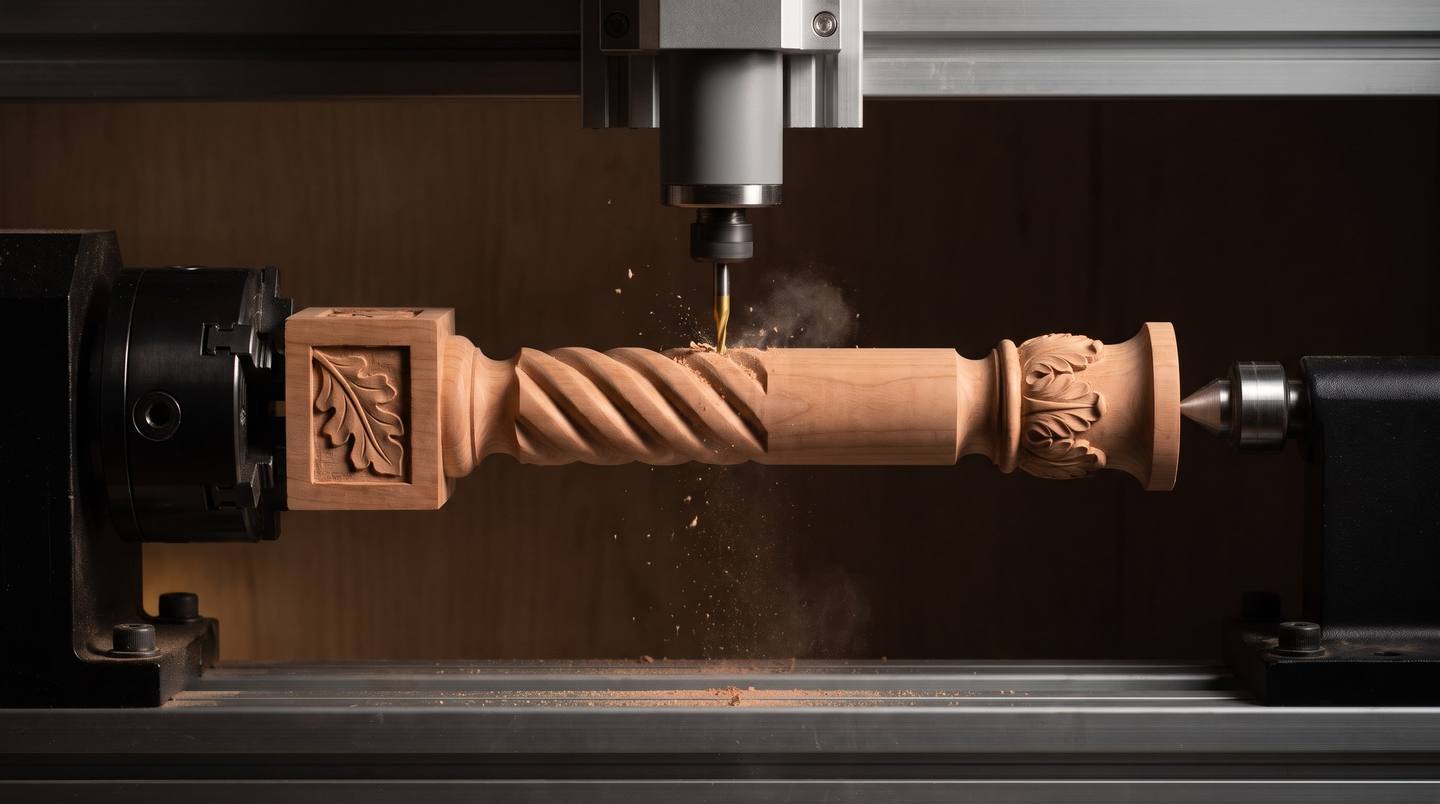
The short answer: a rotary axis (the 4th axis) turns the workpiece while your CNC router carves it, so the carving can run all the way round a round piece with no seam. It carves in two ways: wrapped, where the stock turns during the cut (twists, flutes, patterns round a cylinder), and indexed or 3+1, where the axis turns to an angle, locks, and the machine carves that face like a normal flat job. It is the right tool for long, round things like legs, rolling pins, bats and candlesticks. For flat-ish objects with a front and a back, like a spoon, two-sided machining on a plain 3-axis machine is usually simpler.
This guide follows one piece through: a cherry candlestick with a barley twist, a carved leaf collar and a square foot with a leaf panel on each face. It uses both kinds of rotary toolpath, and it shows where a rotary stops being the right tool.
What this guide covers
- What a rotary axis is
- Wrapped vs indexed (3+1)
- Software
- Setting up the axis and the zeros
- Holding the stock
- Choosing and preparing stock
- Clearance and bit reach
- Feeds on a rotary
- What carves well on a rotary
- What does not
- Rotary or two-sided?
- Questions
- Files
What a rotary axis is
A rotary axis is a motor-driven chuck, like the headstock of a small lathe, that bolts to your CNC's bed. The work is held between the chuck at one end and, for longer pieces, a tailstock with a live centre at the other. The axis of rotation runs parallel to the machine's X axis, and the rotation itself is called the A axis.
Unlike a lathe, the rotary does not spin fast. It turns slowly and precisely, under the control of the toolpath, while a normal router bit in the spindle does the cutting. The bit always points at the centre of the stock, so what it can reach is everything you can see when you look at the piece from the outside, all the way round.
On hobby machines the rotary is wired one of two ways. Some kits plug into the Y-axis driver: you swap the cable, and the machine runs rotations instead of Y moves. Others are a true 4th axis on a 4-axis controller, so X, Y, Z and A all work at once. Either way, the controller has to know how many motor steps make one degree, and the CAM post-processor has to match how your axis is wired. A wrong setting is easy to spot: a pattern that should close round the stock either overlaps itself or leaves a gap.
Wrapped vs indexed (3+1)
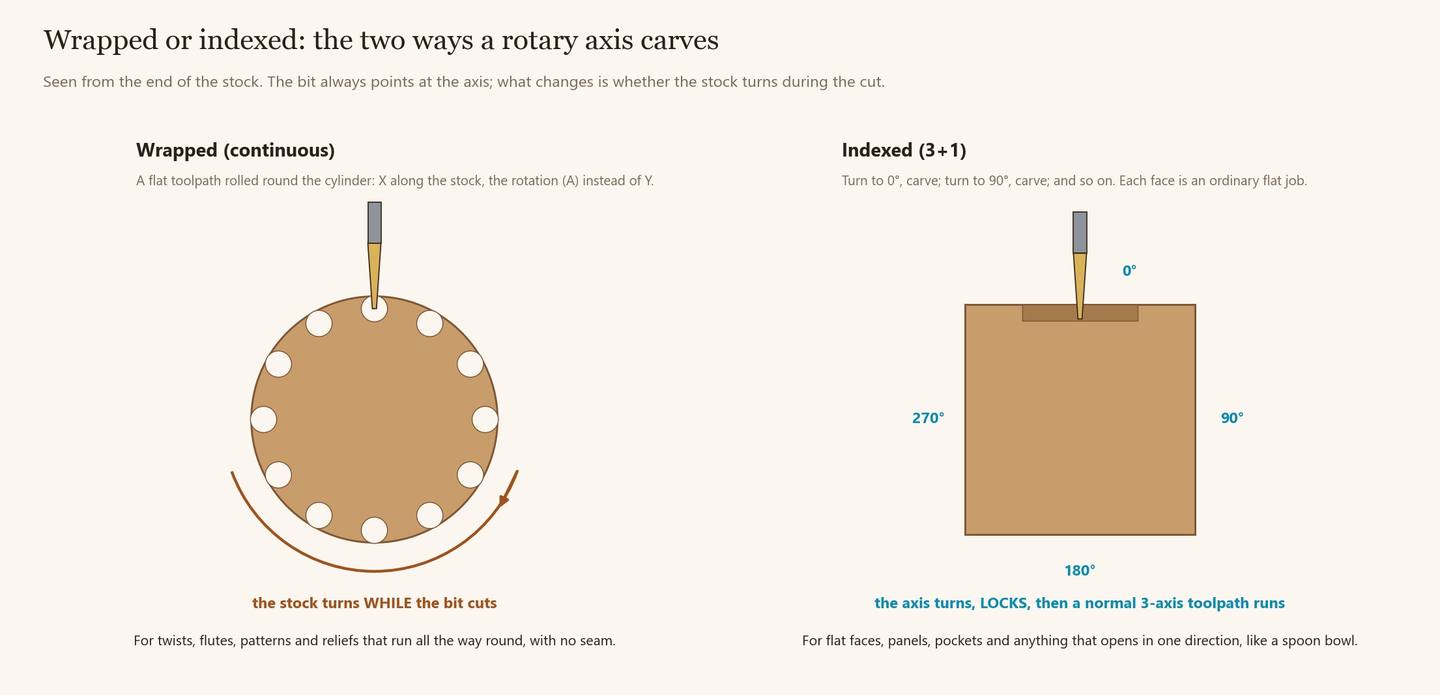
Wrapped (continuous) toolpaths
Imagine the surface of the cylinder unrolled into a flat rectangle: its length is the length of the stock, its width is the circumference. The CAM program calculates an ordinary toolpath on that rectangle, then wraps it back round the cylinder, so movement across the rectangle becomes rotation of the A axis. The bit moves along X and up and down in Z while the stock turns underneath it.
This is how you carve anything that runs round the piece without a seam: barley twists, spiral flutes, rope patterns, lettering round a bat, a relief that wraps a rolling pin. It is also how a square blank is first roughed round.
Indexed (3+1) toolpaths
Here the axis turns to a fixed angle and stops. The machine then runs a normal 3-axis toolpath, exactly as if the piece were lying flat on the bed. Then the axis turns to the next angle, often 90 degrees on, and the next toolpath runs.
Indexed passes are for anything that faces one direction: the flat faces of a square foot, a panel carved into one side of a table leg, a mortise, a pocket, a flat for a label, or the bowl of a spoon. They are also the easiest way to make a few flat 3-axis carvings on four sides of one block with perfect registration between them, because the axis does the turning.
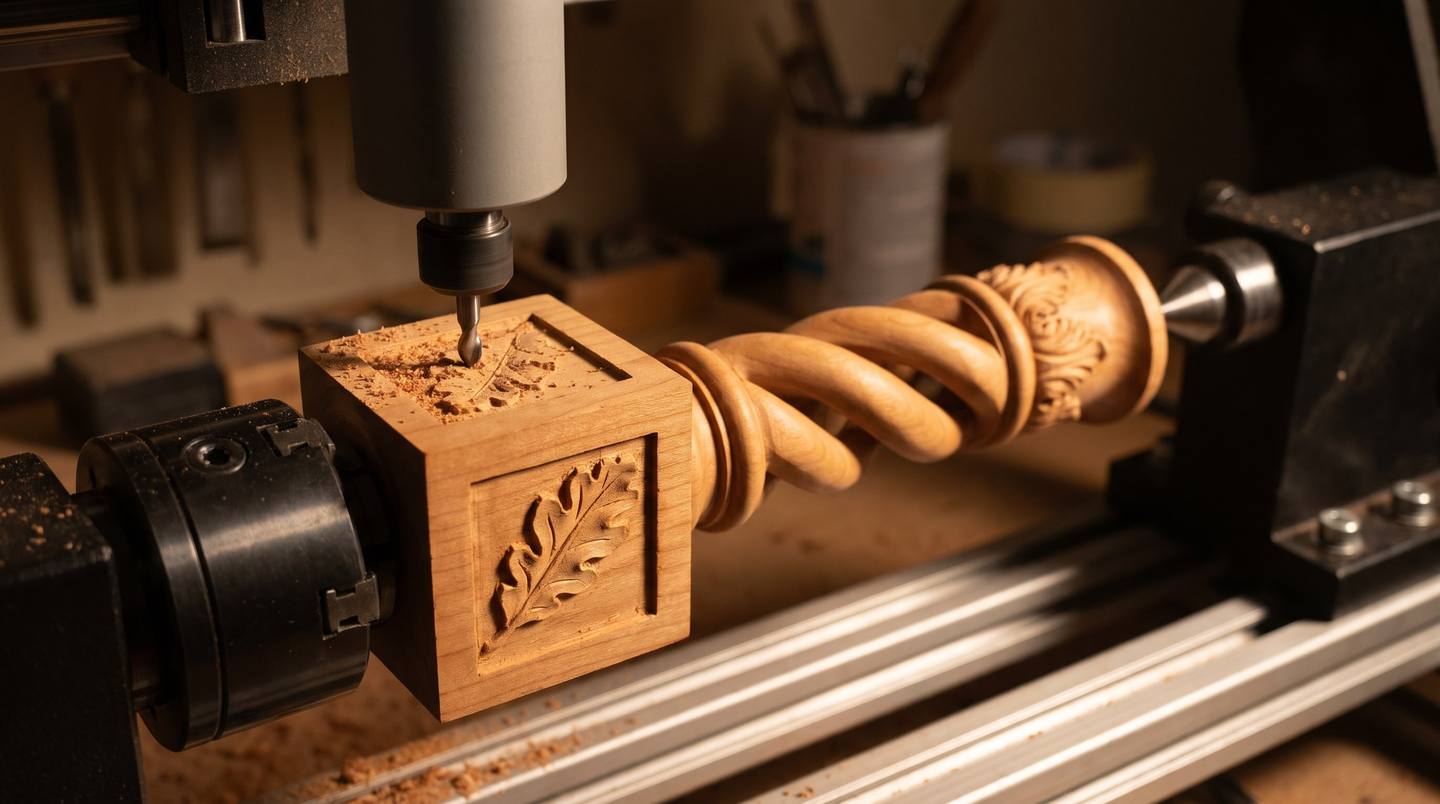
Most real rotary pieces use both: a wrapped pass for the round parts and indexed passes for the flat parts. The candlestick here is wrapped for the twist and the leaf collar, indexed four times for the leaf panels on its foot.
There is a third mode, simultaneous 4-axis, where the bit also tilts or the toolpath is calculated in true 3D round a model rather than wrapped from a flat one. It is the most capable and the most demanding on software, and for most hobby work wrapped and indexed cover everything.
Software
Rotary support varies more between programs and editions than any other feature, so check the edition you own before you buy an axis:
- Vectric VCarve and Aspire have a rotary job type that wraps toolpaths round a cylinder. Aspire adds tools for modelling 3D shapes on the axis and projecting 3D toolpaths onto them.
- Autodesk Fusion handles indexed setups and rotary toolpaths in its paid tiers. Check what your licence includes.
- Other CAM programs offer rotary in some editions and not in others. Look for "rotary", "wrapping" or "4th axis" in the feature list of the exact edition. Our CAM comparison covers editions and prices.
Whichever you use, the post-processor matters as much as the program: it must write the A-axis moves the way your controller expects, or write them as Y moves for a Y-wired axis. Use the rotary post that matches your machine, never the plain 3-axis one.
Setting up the axis and the zeros
- Bolt the axis parallel to X. Clamp a straight test bar between the centres and run a dial indicator along it on the X axis. Shim or tap the axis until the reading barely changes from end to end; a twisted axis carves a taper you never designed.
- Find the centre height. Measure the height of the axis centre above the bed once and write it on the axis. Most rotary CAM asks for it.
- Zero X at a known point along the stock, usually the end face at the chuck or a pencil mark, as the job setup says.
- Zero Z where your CAM expects it. The most robust choice, offered by most rotary software, is the centre of the axis: it does not change when the stock is not quite round or not quite the diameter you entered. The alternative is the top of the stock, which works if the diameter you enter is accurate.
- Zero A with a pencil line on the stock pointing straight up, so you can repeat it if you ever remove and remount the work.
- Y is set once over the axis centreline and never moved during a rotary job: the bit has to point at the centre.
Holding the stock
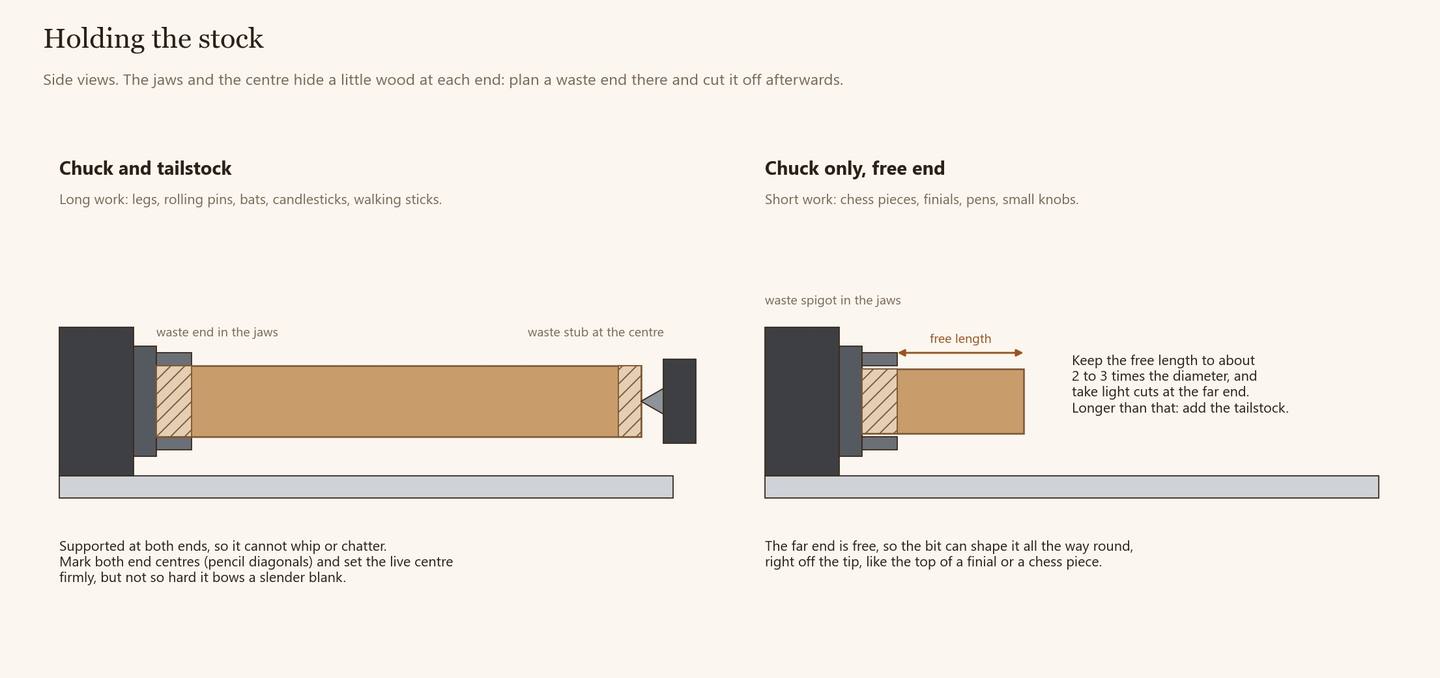
Chuck and tailstock
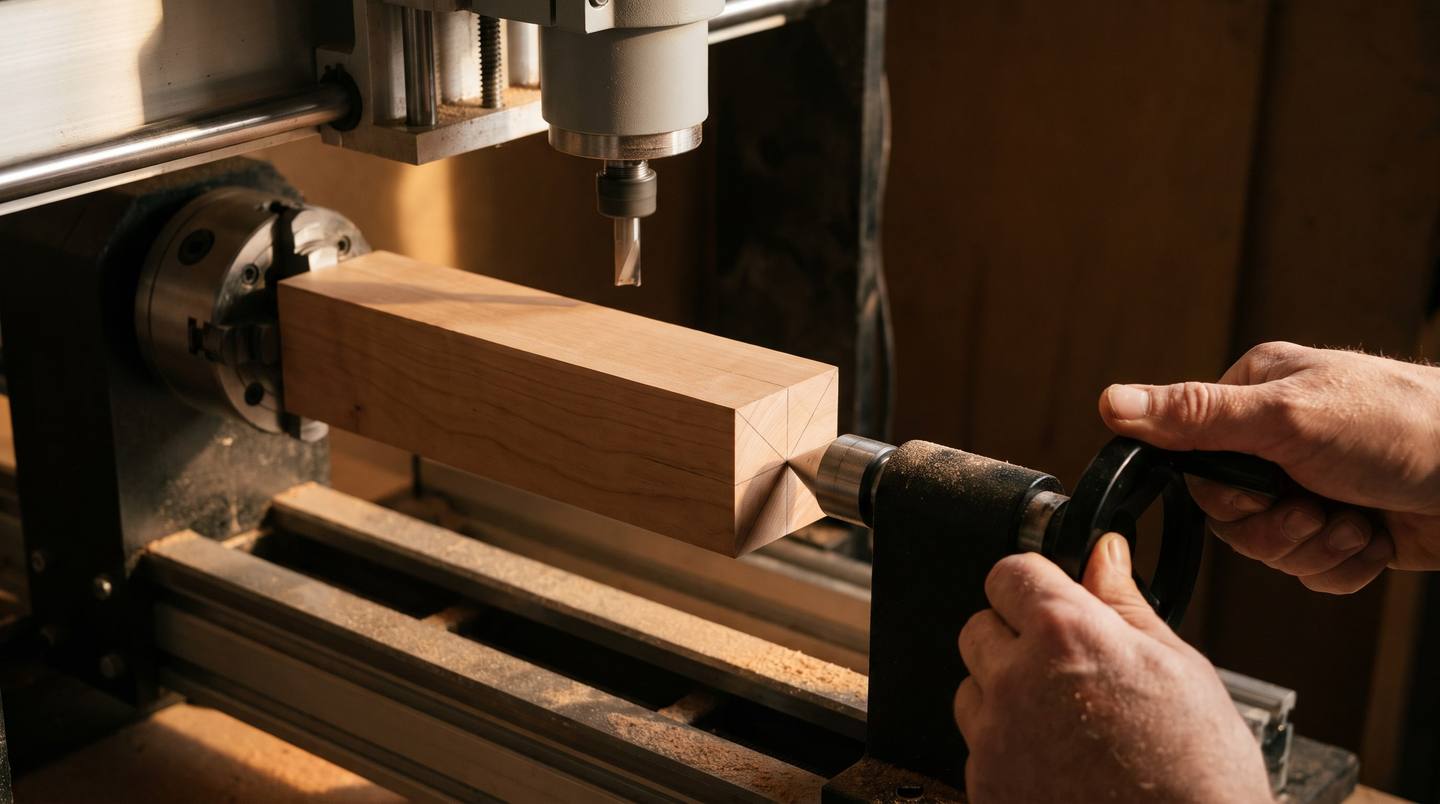
For anything longer than a few diameters (legs, rolling pins, bats, candlesticks, walking sticks) grip one end in the chuck and support the other on the tailstock's live centre. Mark the centre of each end with pencil diagonals, set the live centre into the mark, and lock it firmly. Not so hard that it bows a slender blank, which then springs back when it is carved.
Chuck only, with a free end
Short work (chess pieces, finials, pen blanks, knobs) can be held in the chuck alone, which leaves the far end free for the bit to shape right off the tip. Keep the free length short, about two to three times the diameter as a rule of thumb, and take lighter cuts as you get further from the jaws. Longer than that and the work starts to whip and chatter: bring up the tailstock.
Waste ends
The bit cannot cut where the jaws are, and it cannot cut through the live centre. Plan a waste spigot of about 20 to 25 mm at the chuck end and a small stub at the tailstock end, and saw them off afterwards. A 4-jaw chuck grips a square blank directly; a 3-jaw chuck wants a round spigot.
Choosing and preparing stock
- Straight-grained, dry hardwood. Maple, cherry, walnut, ash and beech all carve cleanly on a rotary; our wood guide compares them. Ash and maple are the traditional bat woods; maple and beech make the best rolling pins.
- No knots, checks or splits, especially in thin sections like a twist. A rotary loads the whole length in bending; a hidden split opens up.
- Square or round. A square blank is fine: the first wrapped roughing pass turns it round. A pre-turned or dowel blank saves that pass and a lot of dust.
- Centred and balanced. An off-centre blank wobbles and gives an uneven depth of cut. Find the centres carefully.
- Long enough for the finished piece plus both waste ends.
Clearance and bit reach
On a flat job the question is whether your Z travel covers the board. On a rotary it is whether the whole stock fits between the axis and the collet nut, because the axis already sits high above the bed.
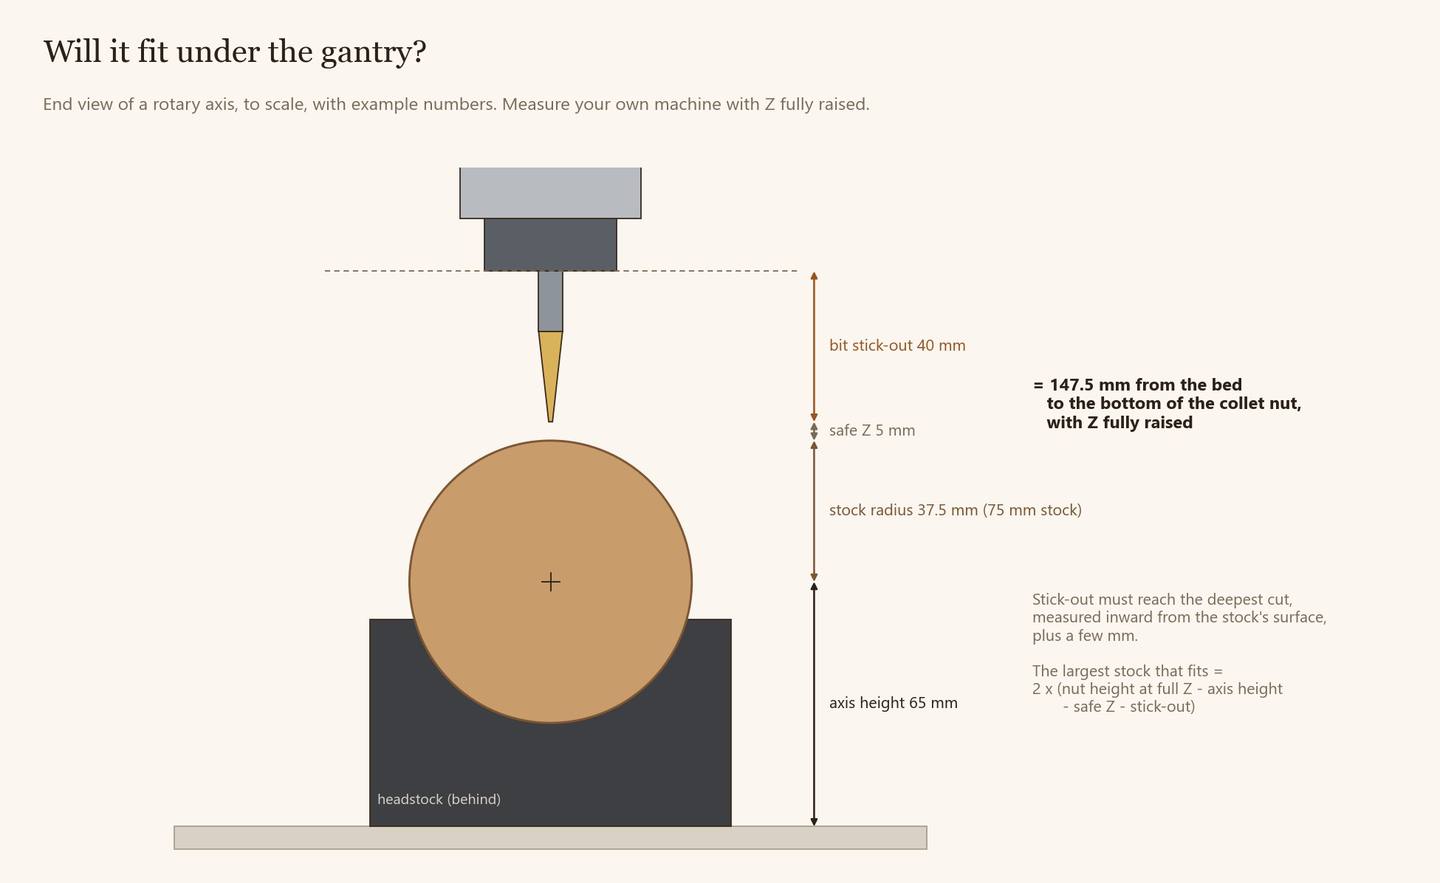
- Largest stock that fits = 2 x (height of the collet nut at full Z, minus the axis height, minus a safe Z, minus the bit's stick-out). If that comes out smaller than your blank, the job does not fit.
- Stick-out must reach the deepest cut measured inward from the stock's surface, plus a few millimetres. On a twist, the groove between two ribs can be deep and narrow, so a tapered ball nose is the usual finishing bit: a fine tip on a stiff cone, the same reason it is the bit of choice for deep two-sided work. Our tapered ball nose guide covers the sizes.
- Watch near the chuck. The collet nut is wider than the bit. Cutting close to the jaws, check in the simulation that the nut never meets the chuck.
- Grip at least 20 mm of shank in the collet, never the flutes. Long stick-out deflects; slow down to match.
Feeds on a rotary
Feed rate on a rotary is less obvious than on a flat job. When the stock turns under a still bit, the speed at which wood passes the cutter depends on the diameter: the same rotation is slow on a thin stem and fast on a thick foot. Most rotary post-processors convert this for you, but not all controllers read A-axis feeds the same way, and some treat them as degrees per minute.
So: start with the feeds you would use for the same bit on a flat job, run the first wrapped pass with the feed override turned down, and watch and listen at the largest diameter. If the cut sounds right there, it is right on the thinner parts too. The finishing stepover works exactly as on a flat job; our stepover guide has the numbers.
What carves well on a rotary
- Rolling pins, carved or embossing pins with a pattern all the way round.
- Bats and handles, with carved grips, rope bands or lettering wrapped round.
- Table and chair legs, balusters and newel posts, with flutes, reeding and carved collars, and indexed panels or mortises on their square sections.
- Candlesticks and lamp bases, like the one in this guide.
- Twists: single and double barley twists and open twists, which are slow and tricky by hand and natural on a rotary.
- Chess pieces, finials and knobs, held in the chuck with a free end.
- Walking sticks and staffs, carved along their length in sections.

Finishing a rotary piece is the same as any carving: brush, sand, then oil or wax, as in our finishing guide.
What does not
- Anything along the axis. The bit only ever points at the centre, so it cannot bore into the end of the stock. The candle cup in the top of the candlestick, a hole for a lamp cord or a hollow for a pen refill is drilled afterwards on a drill press or a lathe.
- Deep pockets that open in one direction. A spoon bowl, a tray hollow or a box pocket is not round, so a wrapped toolpath is the wrong tool. It needs an indexed pass with the axis locked, which makes it a 3-axis job on a rotary.
- Surfaces hidden from the outside. Anything you cannot see when you look at the piece from outside, all the way round, is an undercut for a rotary too: the inside of an open twist, the gap behind an ear that faces along the axis. The bit leaves it as wood.
- Long, slender pieces. A thin spindle whips away from the bit unless it is supported at both ends and cut lightly.
- Flat panels and reliefs. If the back is flat, the rotary adds setup and gives nothing back. Carve it flat.
Rotary or two-sided?
Both carve objects "in the round" on a hobby CNC. They suit different shapes.
For the whole two-sided method, from the dowel holes and the flip to tabs and bit reach, see our two-sided CNC machining guide.

| Rotary (4th axis) | Two-sided (3-axis, flipped on pins) | |
|---|---|---|
| Best shapes | Long and round: legs, pins, bats, candlesticks, twists | Flat-ish with two faces: spoons, utensils, small figures, ornaments, plaques carved both sides |
| Extra hardware | A rotary axis, chuck and tailstock, and enough clearance above the axis | None: a jig board and two steel dowel pins |
| Seam | None on wrapped parts | A parting line where the halves meet, sanded off |
| Size limit | Diameter set by the clearance above the axis; length by the rail | Thickness set by bit reach; length and width by the bed |
| Software | Rotary support, often a higher edition, plus a matching post-processor | Any CAM that machines STL; a two-sided mode helps but is not required |
| Holding | Chuck and tailstock; waste ends | Clamps on the frame; tabs hold the part |
| Hardest part | Clearance, centring and feeds that change with diameter | Registration through the flip and bit reach |
A spoon makes the difference clear. You could carve one on a rotary, with the handle wrapped and the bowl as an indexed pocket, but you would fight the shape all the way. Flat on the bed, carved from the front, flipped on two pins and carved from the back, it is a straightforward 3-axis job.
Questions
What is a 4th axis on a CNC router?
A rotary axis that turns the workpiece about a line parallel to X, called the A axis. The router bit cuts while the stock turns, so carving can go all the way round a round piece.
What is the difference between wrapped and indexed rotary machining?
Wrapped toolpaths turn the stock during the cut, for twists, flutes and patterns that run round the piece. Indexed (3+1) toolpaths turn the stock to an angle, lock it, and run a normal flat toolpath, for flat faces, panels and pockets.
Do I need a tailstock?
For anything longer than about two to three times its diameter, yes. A tailstock with a live centre stops long work whipping and chattering. Short pieces like chess pieces and finials can be held in the chuck alone.
How big a piece can my rotary carve?
The diameter is limited by the clearance between the axis and the collet nut: twice the height of the nut at full Z, minus the axis height, a safe Z and the bit's stick-out. The length is limited by the rail between the chuck and the tailstock.
Can I carve a spoon on a rotary axis?
You can, using a wrapped pass for the handle and an indexed pass for the bowl, but a spoon is easier as a two-sided job on a 3-axis machine: carve the front, flip the blank on two dowel pins, carve the back.
Why does my rotary carving not line up all the way round?
Usually the steps per degree on the controller are wrong, the post-processor does not match how the axis is wired, or the diameter entered in the CAM is not the real one. Check the steps on a test cut with a single line wrapped all the way round.
Files
We do not sell rotary files yet. They are coming, prepared the same way as our two-sided jobs: files for the axis, the indexed passes, the stock size, the bits and a step-by-step guide.
Meanwhile, if you have a 3-axis machine you can carve in the round today: our two-sided collection has animal-head serving spoons and Christmas spoons, each with the split halves, tabs, dowel positions, a setup card and a step-by-step machining guide.