
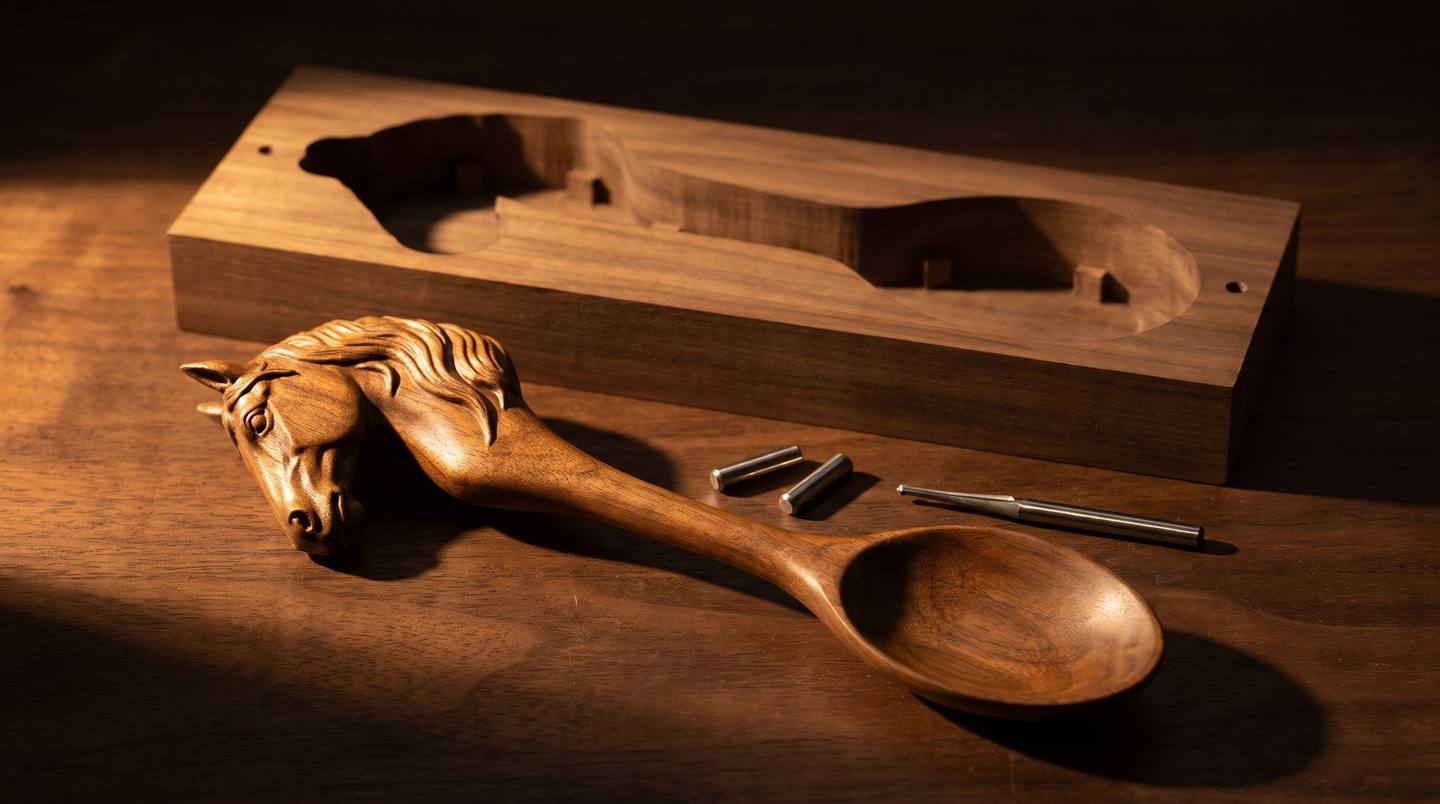
The short answer: two-sided CNC machining carves a full 3D object on an ordinary 3-axis router. You carve side A, drill two dowel holes through the blank into a jig board, turn the board over on those pins, re-zero Z only, and carve side B. The pins put side B exactly where side A left off, so the two halves meet in one clean surface. Small tabs hold the finished piece in its frame until you cut it free. Get four things right and it works first time: the pins, the zero, bits long enough to reach, and tabs on plain wood.
Every number in this guide is real. They come from one of our own designs, the mustang horse head serving spoon, and from the setup card and 23-page machining guide that ship with it. You can follow along with any two-sided file, but if you want the same job, it is linked at the end.
What this guide covers
- What two-sided machining is
- When to use it, and when not
- Machine and software
- Stock, wood and blank prep
- Registration: dowels and the flip line
- Zeroing side A and side B
- Depth per side and bit reach
- Tabs: where, how big, why
- Toolpaths for each side
- The whole job, step by step
- Tabs off, sanding and food-safe finish
- Common mistakes and fixes
- Designing for two sides
- What our two-sided files give you
- Questions
- The designs
What two-sided machining is
A normal relief carving is cut from one face. The bit comes down from above, the back stays flat, and the piece hangs on a wall. That is perfect for a plaque, but it cannot make a spoon, a figure or anything you pick up and turn in your hand, because the underside never gets touched.
Two-sided machining fixes that with one extra move. The model is split at a parting plane partway through the board. Side A is everything above it, cut first from the top. Then the board is turned over and side B, everything below it, is cut from what used to be the bottom. A narrow channel is cut all the way round the part from both sides; where the two halves of the channel meet, the part is free except for a few small tabs that hold it in the surrounding frame.
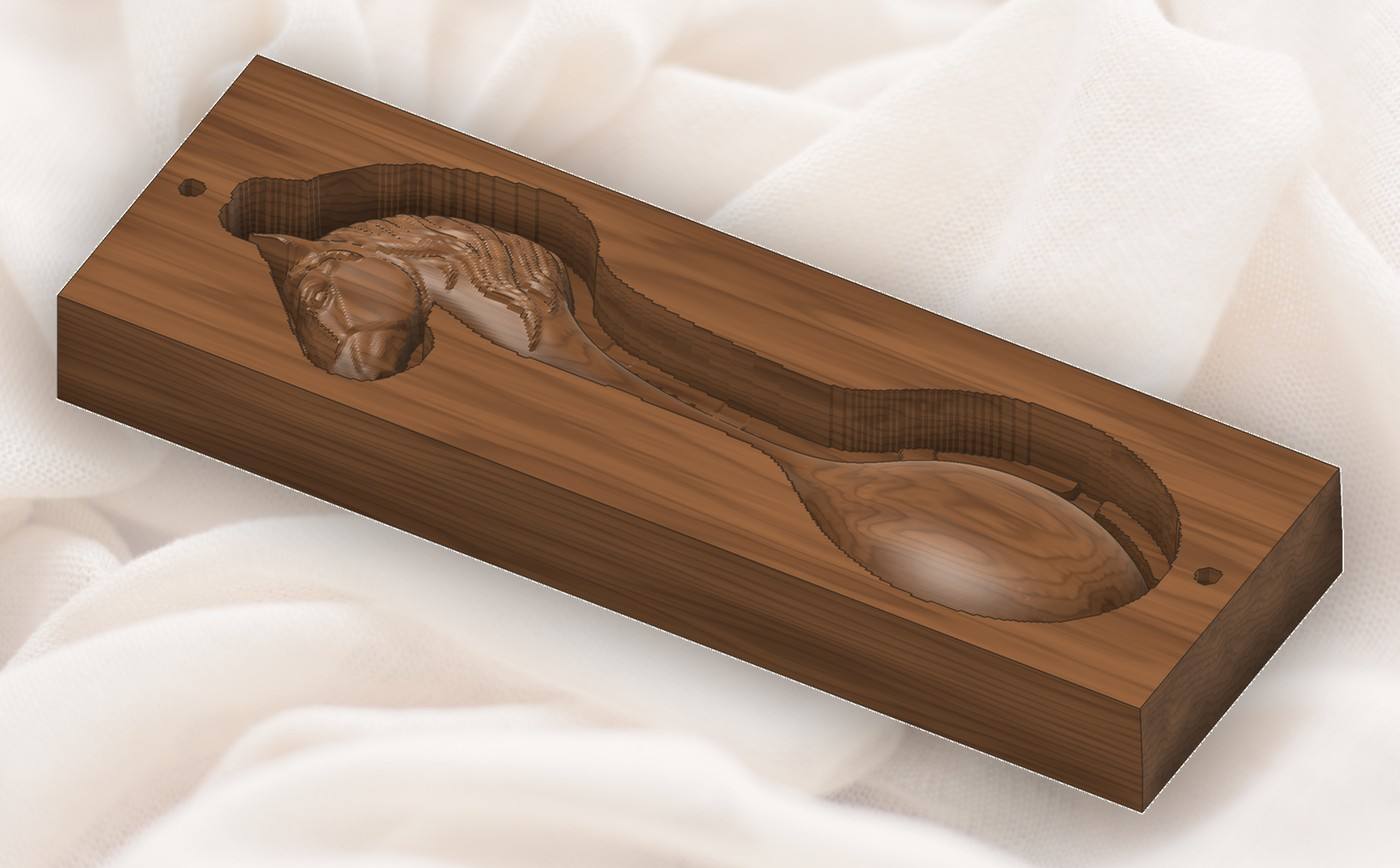
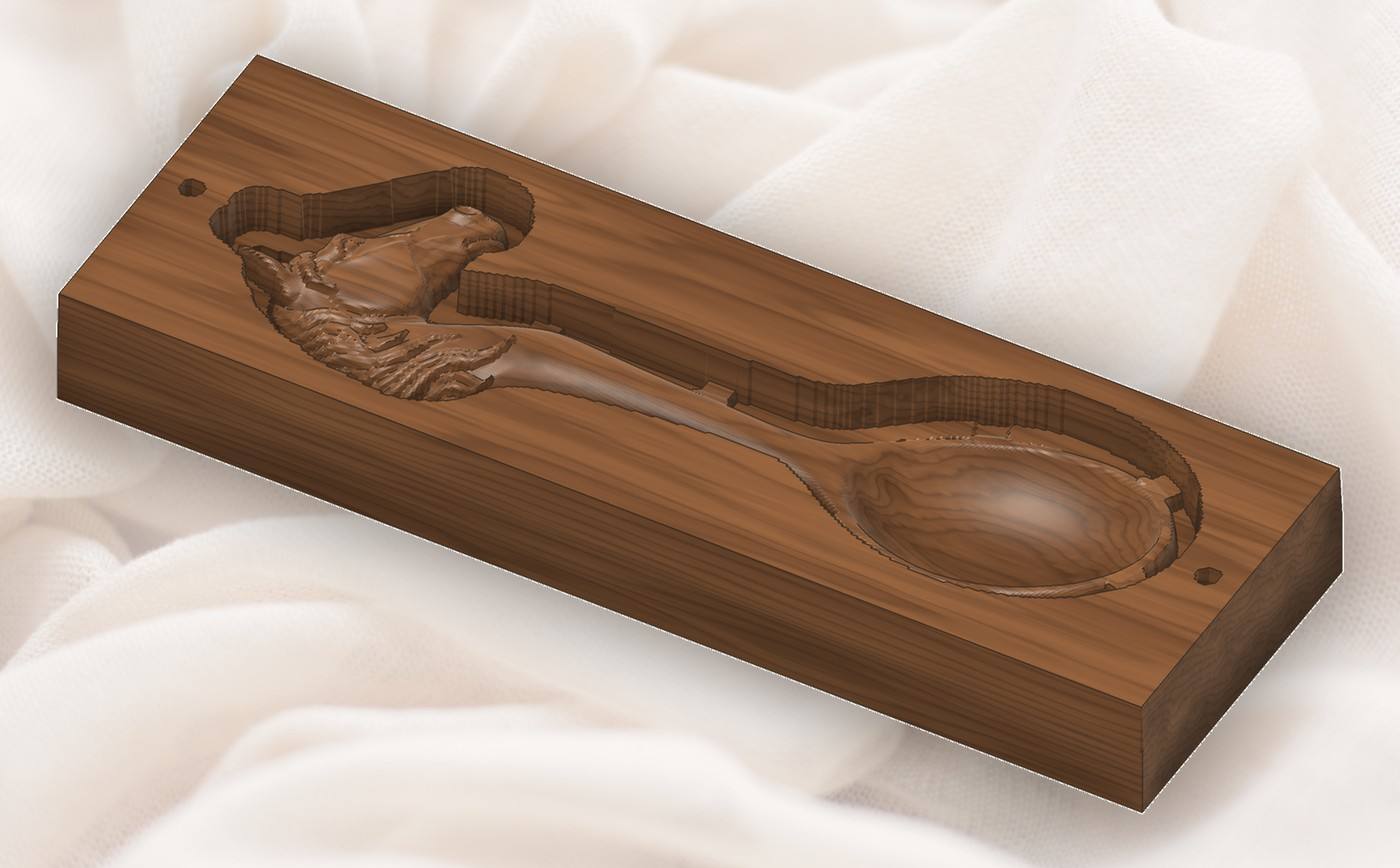
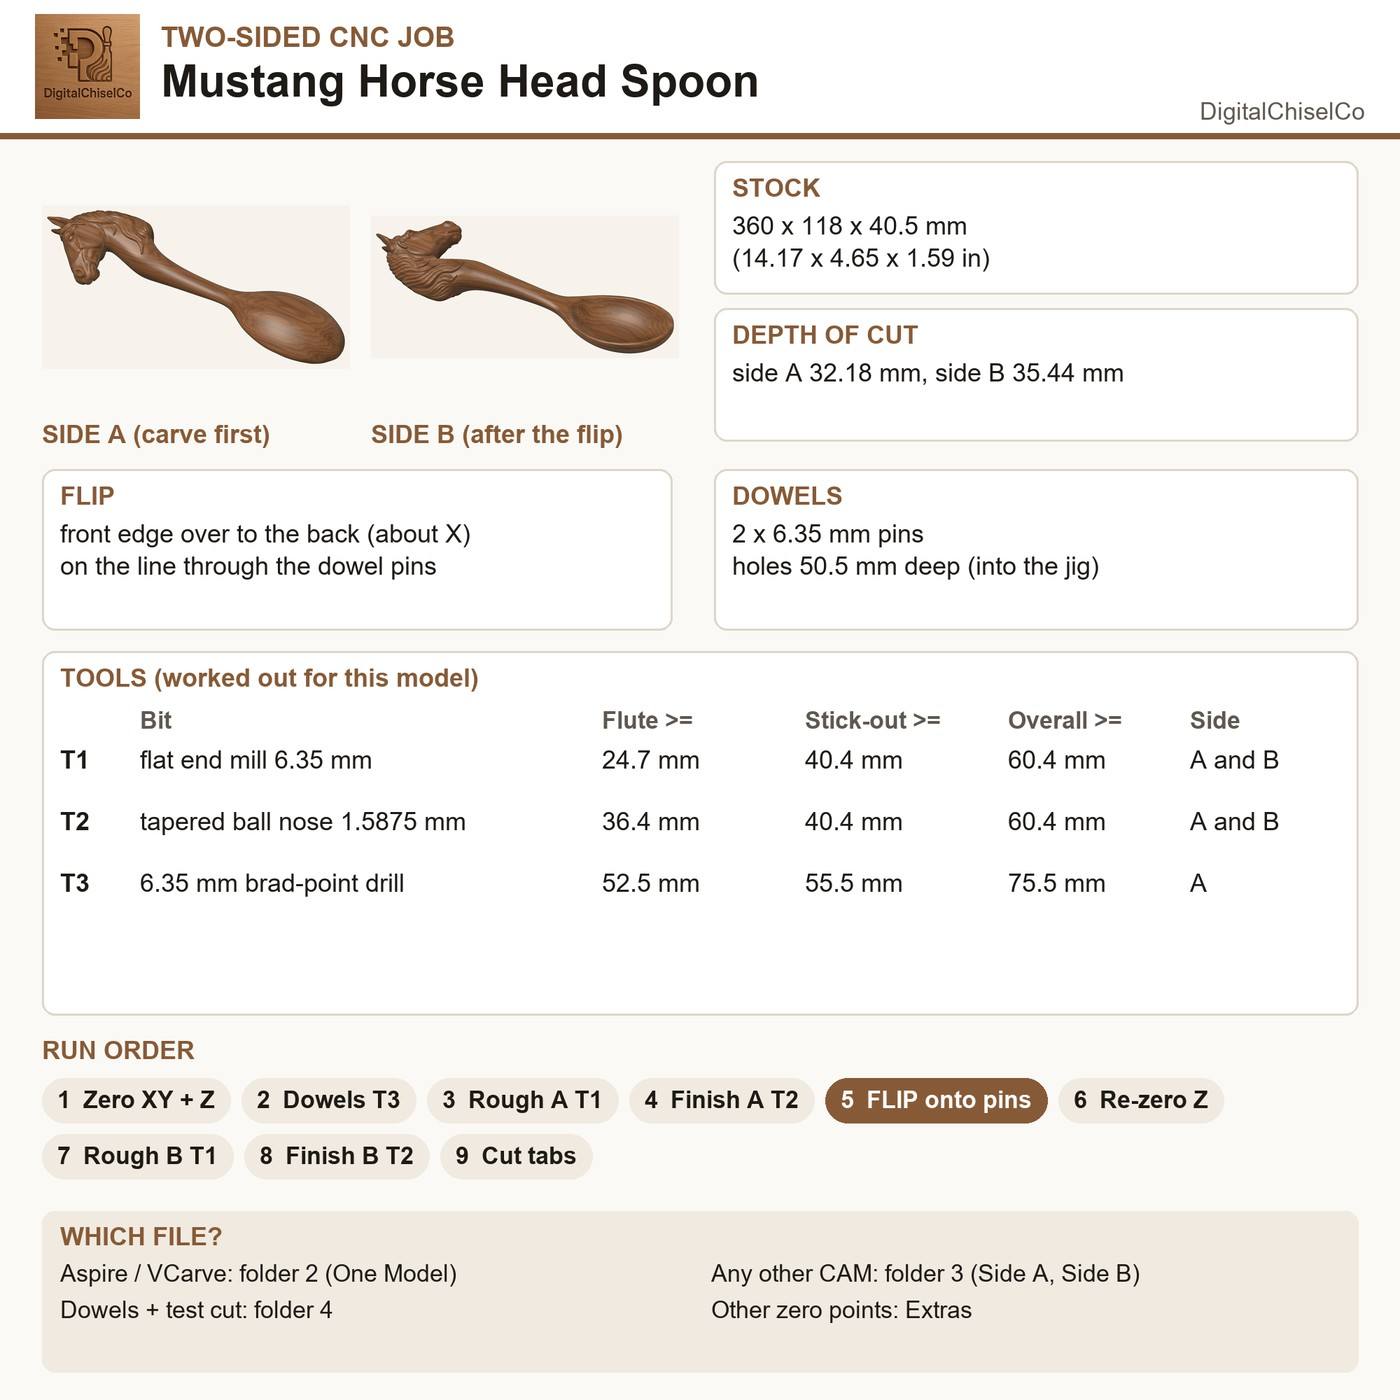
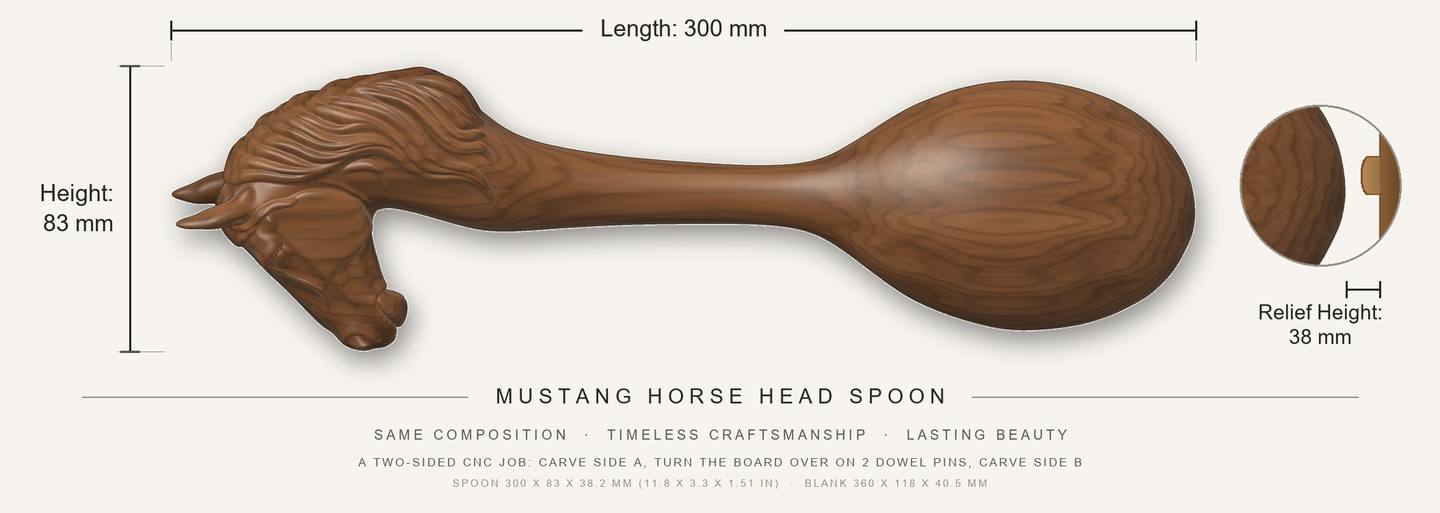
For the mustang spoon the numbers are: a walnut blank 360 x 118 x 40.5 mm (14.17 x 4.65 x 1.594 in), a finished spoon 300 x 83 x 38 mm, a parting plane 16.76 mm above the bottom face, and a channel 7.35 mm wide so a 1/4 in end mill fits round the part. The guide that comes with it calls these out on the first page, and so does every step below.
When to use it, and when not
Use two-sided machining when both faces of the piece will be seen or used: spoons, spatulas and scoops, small animal figures, ornaments that hang free and turn, bottle openers, handles, box lids carved over their edge. Anything that is a real object rather than a picture.
Stay one-sided when the back will be against a wall. A relief panel gains nothing from a carved back, and two-sided work roughly doubles your setup time. Consider a rotary (4th) axis instead when the piece is long and round all the way round, like a rolling pin, a table leg or a candlestick: a rotary turns the stock continuously and has no seam. For flat-ish objects with a front and a back, like a spoon, two-sided on a 3-axis machine is simpler and gives you more detail per hour.
Machine and software
You do not need anything special. Any 3-axis CNC router that can carve a 3D relief can carve two sides. What matters:
- Work area. The blank plus room for clamps. The mustang blank is 360 x 118 mm, so a 400 x 300 mm class machine is enough.
- Z clearance. This is the one people miss. Under the collet nut you need the jig board, the blank, a safe-Z lift and the full stick-out of your longest bit. For the mustang: 13 mm jig + 40.5 mm blank + 5 mm safe Z + 55.5 mm drill stick-out is about 115 mm. Measure your machine with the Z fully raised before you buy wood.
- Rigidity. Two-sided jobs run long bits. A stiff gantry and a spindle with low runout make the difference between crisp and chattered walls.
- A flat, square spoilboard you can screw a jig board to.
On the software side, you need CAM that imports an STL and runs 3D roughing and finishing. Some programs have a dedicated two-sided workflow, which turns side B over for you:
- Vectric Aspire and VCarve Pro: a Double Sided job type, with a "Create both sides" option on import and a flip direction setting.
- Vectric Cut3D: a two-sided machining wizard.
- Autodesk Fusion: two setups, the second with its Z axis flipped.
- MeshCAM: a two-side machining mode.
Others have no flip feature, but they still work fine: Carveco, Easel Pro and Carbide Create Pro run side A and side B as two ordinary one-sided jobs, each from its own STL. The only rule is to give each program the right file, which we come back to under what our files give you. If you are still choosing, our comparison of Aspire, VCarve, Carveco and Fusion covers the prices and the 3D features.
Stock, wood and blank prep
Two-sided work is less forgiving of bad stock than a relief, because the two halves only meet cleanly if the board is the thickness the files expect and lies dead flat on the jig.
Which wood
Close-grained hardwoods carve the fine detail best and hold up to use. For anything that touches food, choose a food-safe hardwood: hard maple, cherry, beech, birch and walnut are the classic spoon woods. Avoid open-grained oak for spoon bowls (the pores hold food), softwoods like pine (soft, resinous and fuzzy on fine detail), and oily exotics that are known skin irritants. Our wood guide compares eight species side by side.
Moisture, grain and size
- Dry wood, 8 to 12 percent moisture. Wet wood moves between side A and side B and the halves no longer meet.
- Grain along the length. A spoon handle with grain running across it will snap at the first drop.
- At least the blank size. 360 x 118 mm for the mustang. If your board is bigger, zero on its centre (or its lower-left corner with the corner-zero files) exactly as the files say.
Thickness: measure it, then tell the software
Measure the thickness with calipers at the four corners and the middle. Our files assume 40.5 mm for this job; anything within about 0.3 mm is fine. Then:
- Thicker: best, plane it down to the file thickness. If you cannot, enter the measured thickness in your CAM and keep the model centred in it; each face gets half the extra as a skin, and the dowel holes go deeper by the same amount.
- Thinner by up to 2 mm: still fine. Enter the measured value and centre the model.
- Thinner than that: the spoon comes out thinner than designed. Use thicker stock.
The board must sit flat with no rock. If it rocks, plane or surface it first, or the two halves will not meet.
Registration: dowels and the flip line
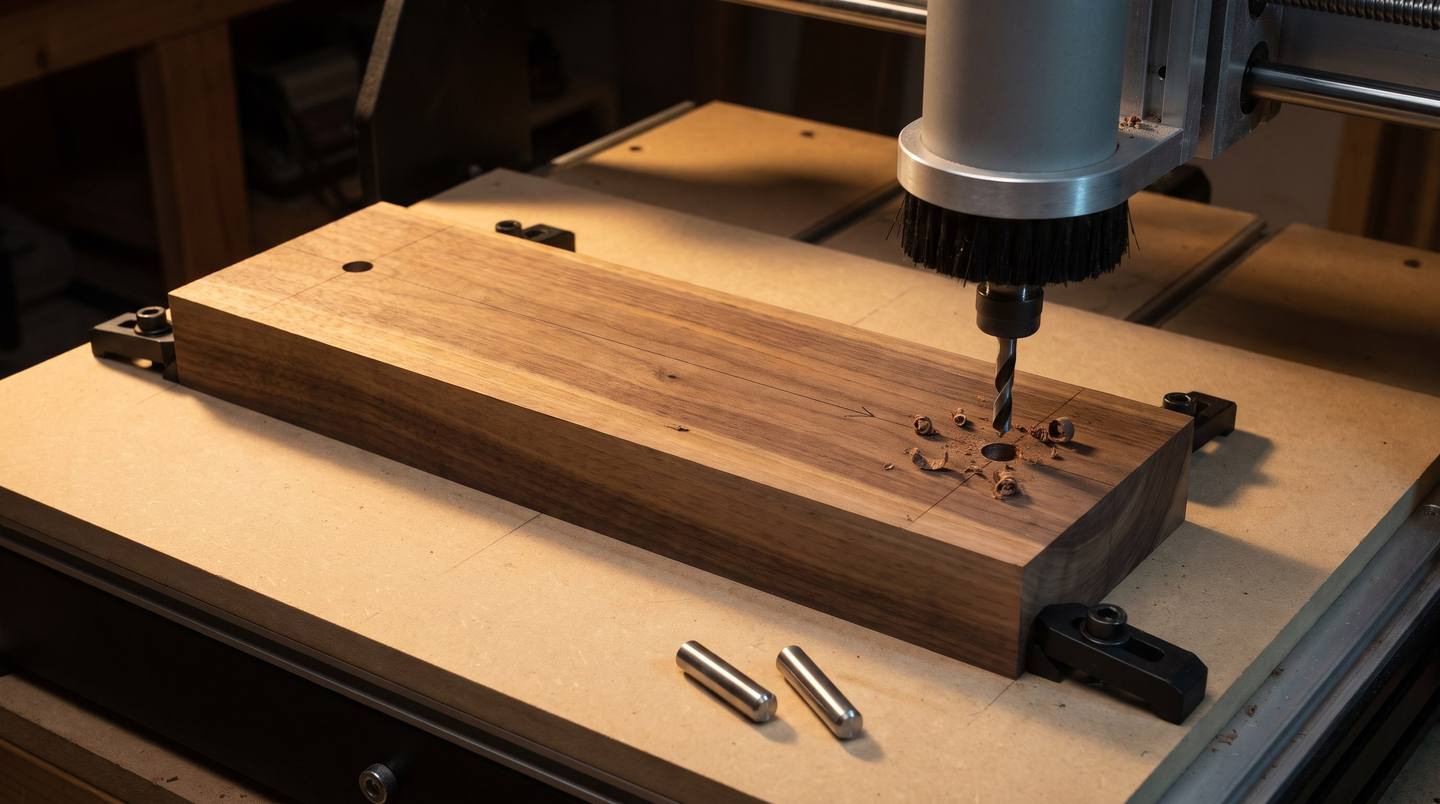
Registration is how side B finds side A again. The reliable way on a hobby machine is two steel dowel pins on the flip line.
- Make a jig board. Screw a flat MDF board, at least 13 mm thick, to the spoilboard and surface it so it is perfectly flat to your machine.
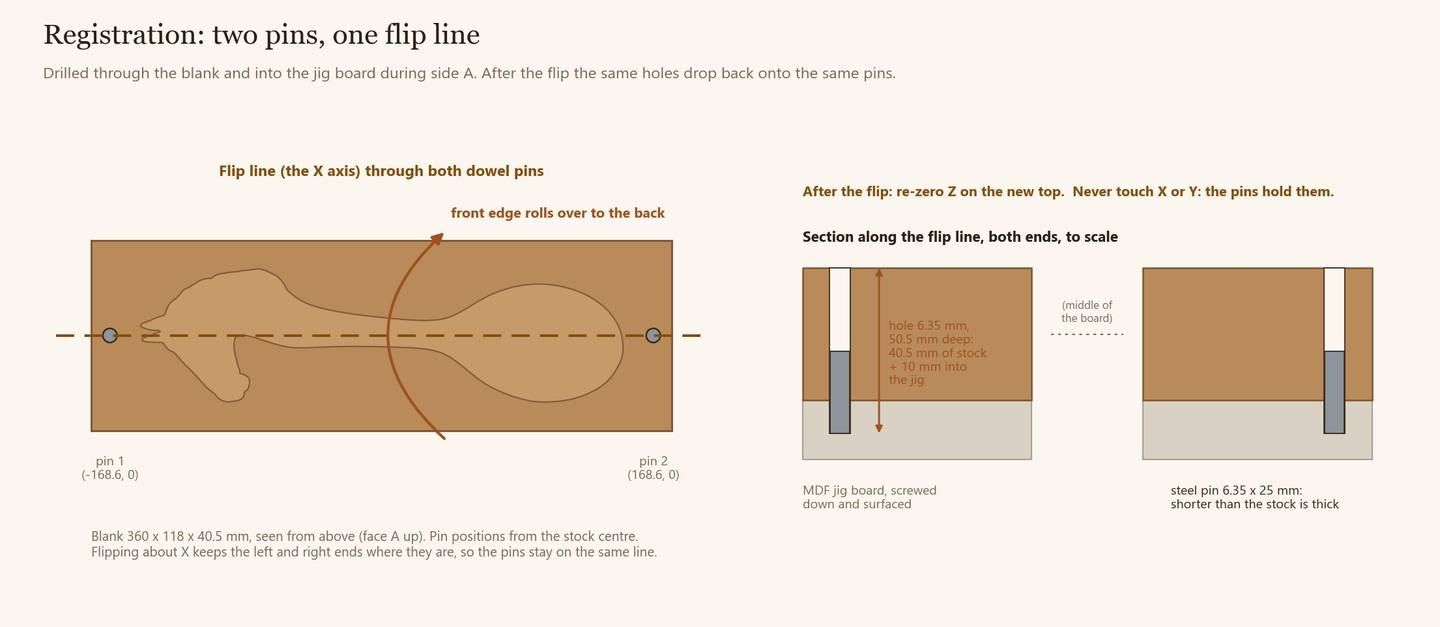
- Drill the dowel holes during side A, with the machine, before any carving. They go right through the blank and 10 mm into the jig board. For the mustang: 6.35 mm (1/4 in) holes, 50.5 mm deep (40.5 mm of stock plus 10 mm), at 168.6 mm left and right of the stock centre, on the centre line.
- Buy two steel dowel pins that are a snug fit, 6.35 mm x about 25 mm. Shorter than the stock is thick, so they never stand proud and meet a bit.
- No dowel pins? Use an old drill bit. The smooth shank of a worn-out 1/4 in (6.35 mm) drill bit, or of an old 1/4 in end mill, makes a perfect pin: hardened, dead straight and exactly the size of the hole. Drop it into the jig board shank end up, cutting end down in the hole, so only the smooth shank meets the blank. Mark it so it never goes back in the bit rack.
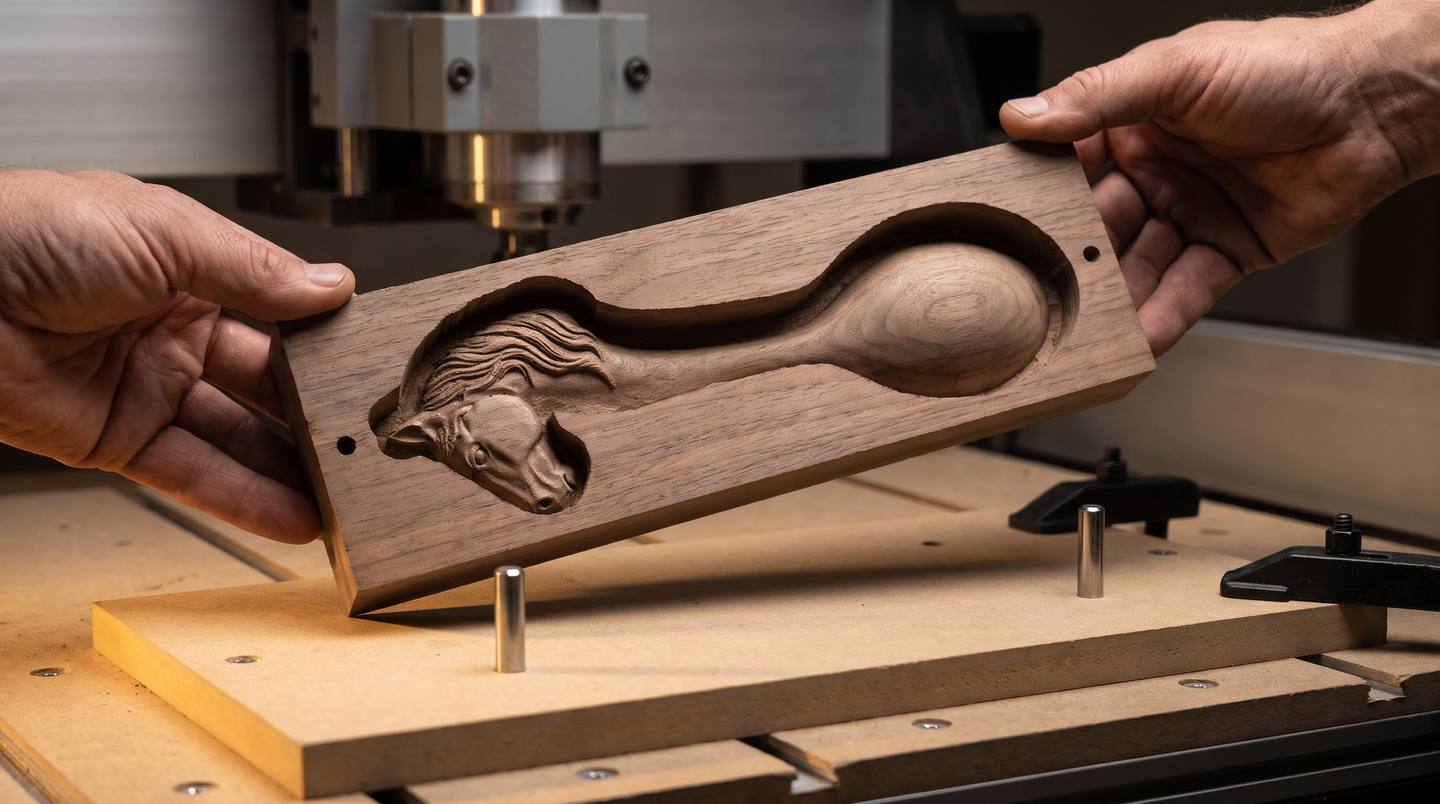
- Turn the board over on the line through the pins. The holes drop onto the same pins and the board is back exactly where it was, only upside down.
Flip along X or along Y
You can turn a board two ways. About X: the front edge rolls over to the back and the left and right ends stay where they are. About Y: the left end goes over to the right. Either works, as long as the pins sit on the line you turn about and the software is told the same direction. Pick the one that keeps the long side of the board along the pins. Our spoons all flip about X, front edge over to the back, which is the right-hand icon in Vectric's flip setting. A wrong flip is the classic two-sided disaster: side B comes out as a mirror image.
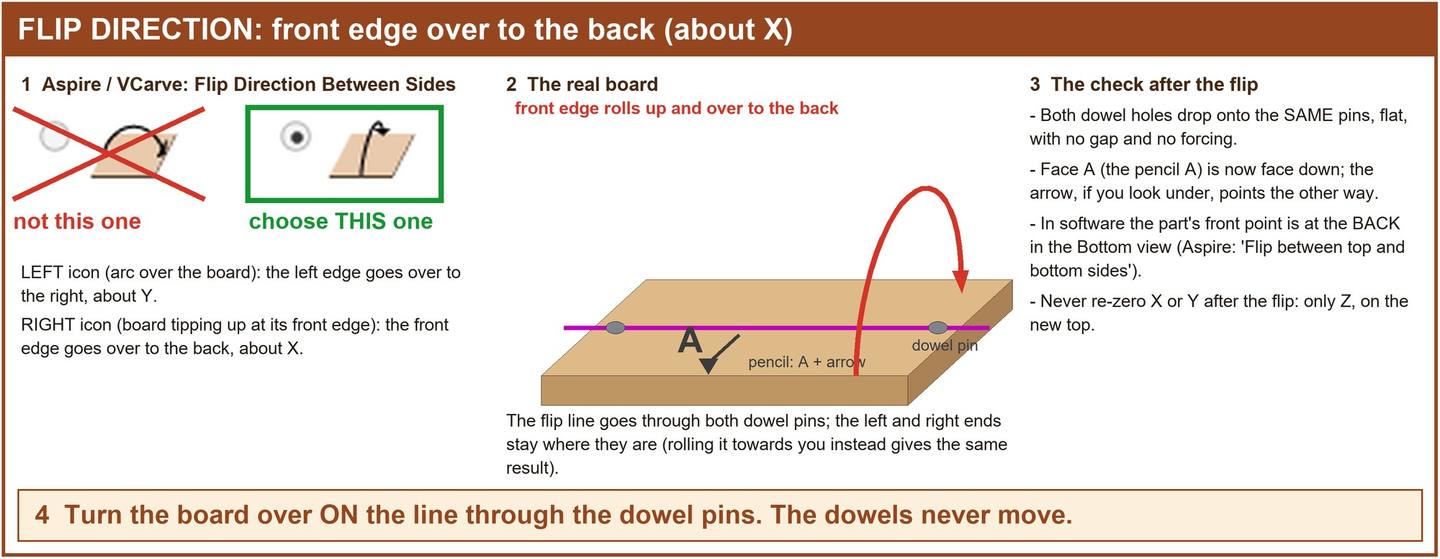
A tip worth the two seconds: before you start, pencil the flip line, an arrow and a letter A on face A. After the flip the A is face down, and a glance tells you the board went over the right way.
Zeroing side A and side B
Two zeros matter, and they are treated very differently.
X and Y: set once, never touched again
Set XY zero for side A wherever your files say. Our default files use the centre of the stock; a corner-zero copy is included for people who prefer the lower-left corner. Write it down. After the flip, do not re-zero X or Y. The pins hold the board exactly where it was. Re-touching XY is the single most common cause of a stepped seam.
Z: on the material surface, re-zeroed after the flip
There are two schools:
- Material-surface zero (our default). Z0 is the top of the wood on side A, then the new top after the flip. It is what most hobby machines and probes are set up for, and it keeps the top surface of each side exactly where the file says. The catch: the CAM must know the real thickness, or the halves meet with a ledge at the parting plane. In Aspire and VCarve this is "material surface" with "zero off same side".
- Table zero. Z0 is the jig board surface under the stock. You touch off once, on a surface that never changes. It suits machines with a fixed touch plate on the bed. The thickness still has to be right in the CAM.
Either is fine. What is not fine is mixing them between sides unless the software expects it. Our packs ship every STL in both: Z0 on top by default, and Z0 on the bottom in the extras folder.
Depth per side and bit reach
Here is the part that ruins more two-sided jobs than anything else. On a relief, the bit only goes 10 or 20 mm deep. On a two-sided job it goes roughly half the board plus a lot more, because the carving on each side dips below the parting plane wherever the part is thin, and the channel round the part has to reach the parting plane through a slot only a little wider than the bit.
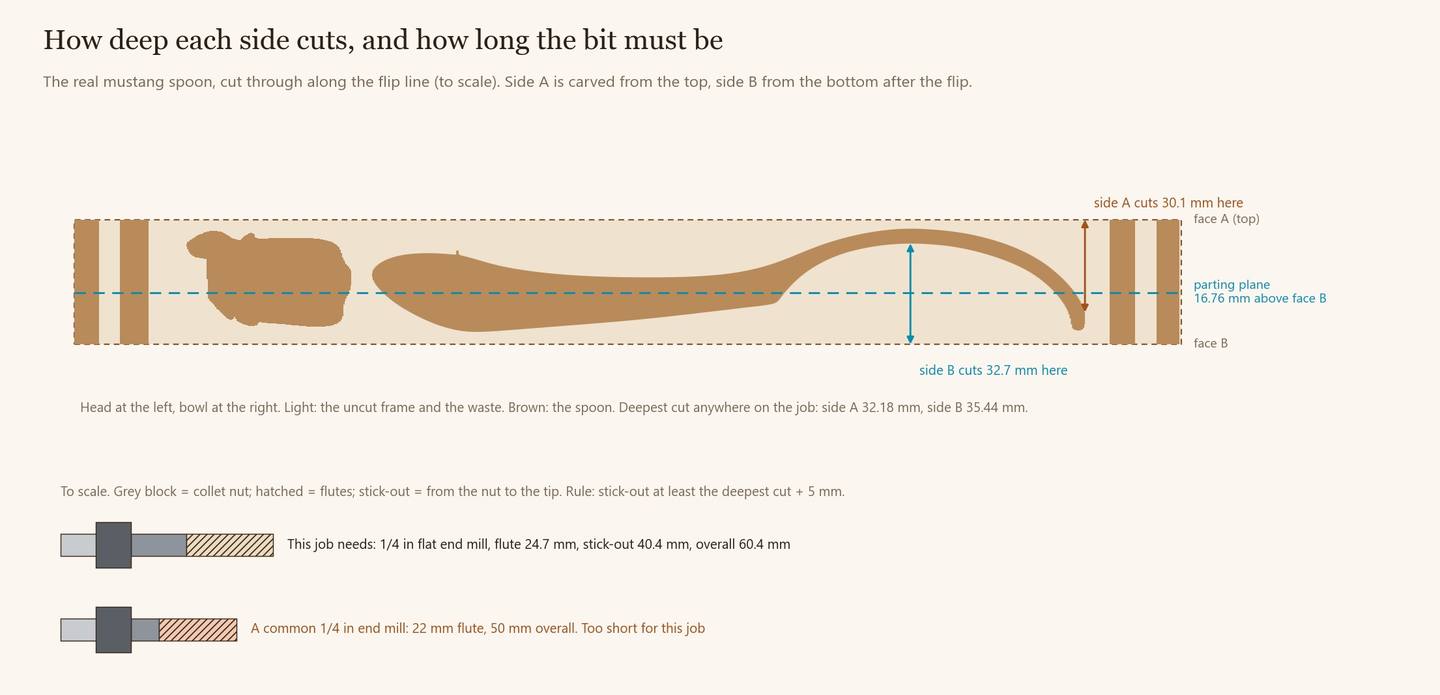
For the mustang, in a 40.5 mm board:
| Measure | Side A | Side B |
|---|---|---|
| Channel depth (to the parting plane) | 23.74 mm | 16.76 mm |
| Deepest cut anywhere | 32.18 mm | 35.44 mm |
So the bits need real reach. The rule we use: stick-out (from the collet nut to the tip) at least the deepest cut plus 5 mm, and the fluted length at least as deep as any slot the shank cannot follow down. The 7.35 mm channel is too narrow for a 1/4 in shank to follow the bit, so the flutes must cover the full channel depth.
| Tool | Job | Flute at least | Stick-out at least | Overall at least |
|---|---|---|---|---|
| T1: 1/4 in (6.35 mm) flat end mill, 2 flute | 3D roughing and the channel, both sides | 24.7 mm | 40.4 mm | 60.4 mm |
| T2: tapered ball nose, 1/16 in (1.59 mm) tip, 1/4 in shank | 3D finishing, both sides | 36.4 mm | 40.4 mm | 60.4 mm |
| T3: 1/4 in brad-point drill (or a down-cut end mill, helical) | Dowel holes, side A only | 52.5 mm | 55.5 mm | 75.5 mm |
Two warnings straight out of the guide: a common 1/4 in end mill with a 22 mm flute and 50 mm overall is too short for this job, and so is a common tapered ball nose with about a 25 mm flute. Check your bits against the card before you start, not halfway through side B. Grip at least 20 mm of shank in the collet, never the flutes.
Long stick-out has a cost: the bit deflects. The feeds in our guides are already halved for it (more on that below), and the clamps have to stay low, because at minimum stick-out the collet nut, about 35 mm across, passes only 16.7 mm above the stock top while the bit cuts the channel. Any clamp near the channel must sit lower than that, so use low-profile clamps or screws in the outer frame.
Tabs: where, how big, why
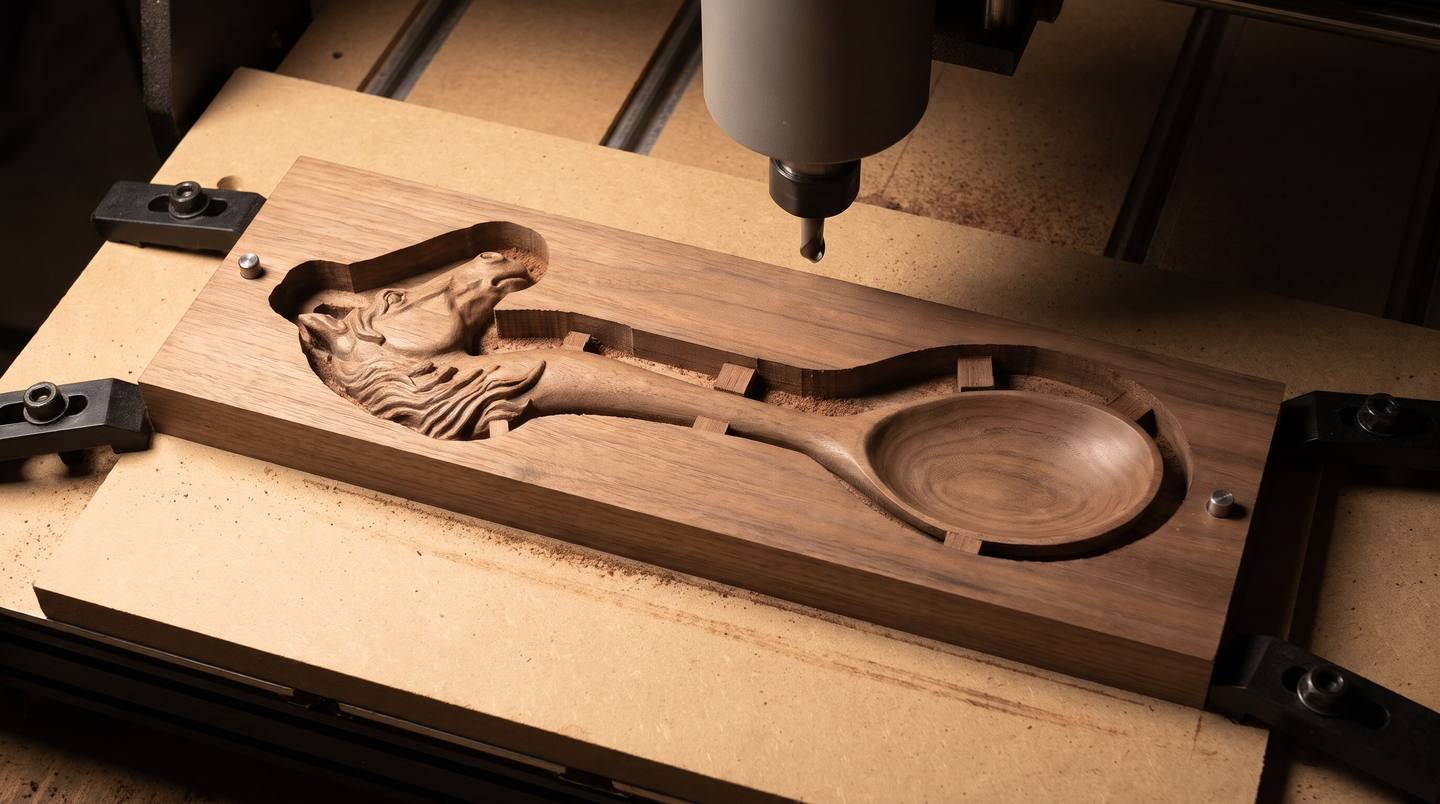
When side B's channel breaks through to meet side A's, the part would come loose and get thrown by the bit. Tabs stop that: small bridges of wood across the channel, left at the parting plane, that hold the part in the frame until you saw it free.
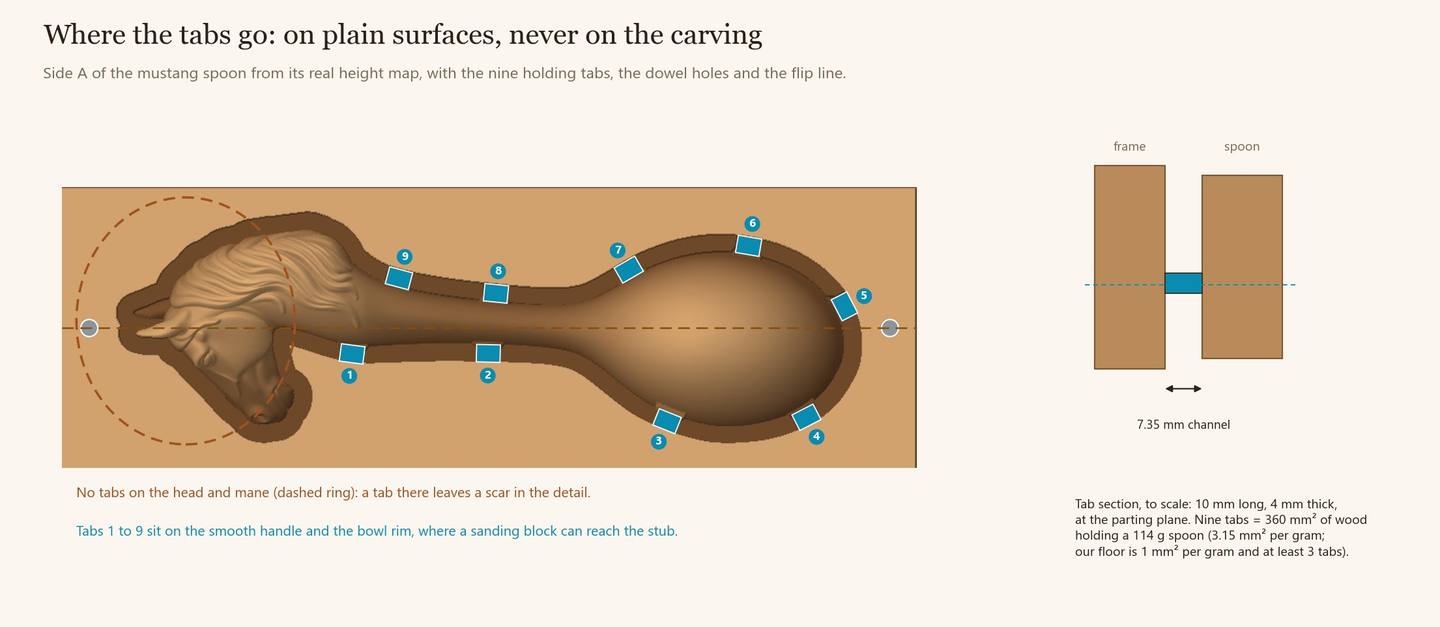
- Put tabs on plain surfaces, never on the carving. Every tab leaves a stub you saw and sand off. On the smooth handle or the bowl rim that is two minutes with a sanding block. On a mane, a face or a feather, it is a scar you cannot sand without losing detail.
- Spread them round the outline, including both sides of long thin parts, so the part cannot twist or vibrate.
- Size them for the part. The mustang uses nine flat tabs, each 10 mm long and 4 mm thick. That is 360 mm² of wood holding a 114 g spoon, or 3.15 mm² per gram. Our floor is 1 mm² per gram and at least three tabs. More and thicker tabs for heavy parts and softwood.
- Check them before the last pass. Pause before side B's finishing pass and press the part gently. If anything moves, stop and add support (hot glue or a wedge in the channel) before you finish.
In our files the tabs are part of the model, so there is no tab setting to get wrong in your CAM: you just machine the surface.
Toolpaths for each side
Each side gets the same pair of toolpaths, and both are limited to a clearance boundary: the outline of the channel. That keeps the bit off the outer frame, which is where your clamps are.
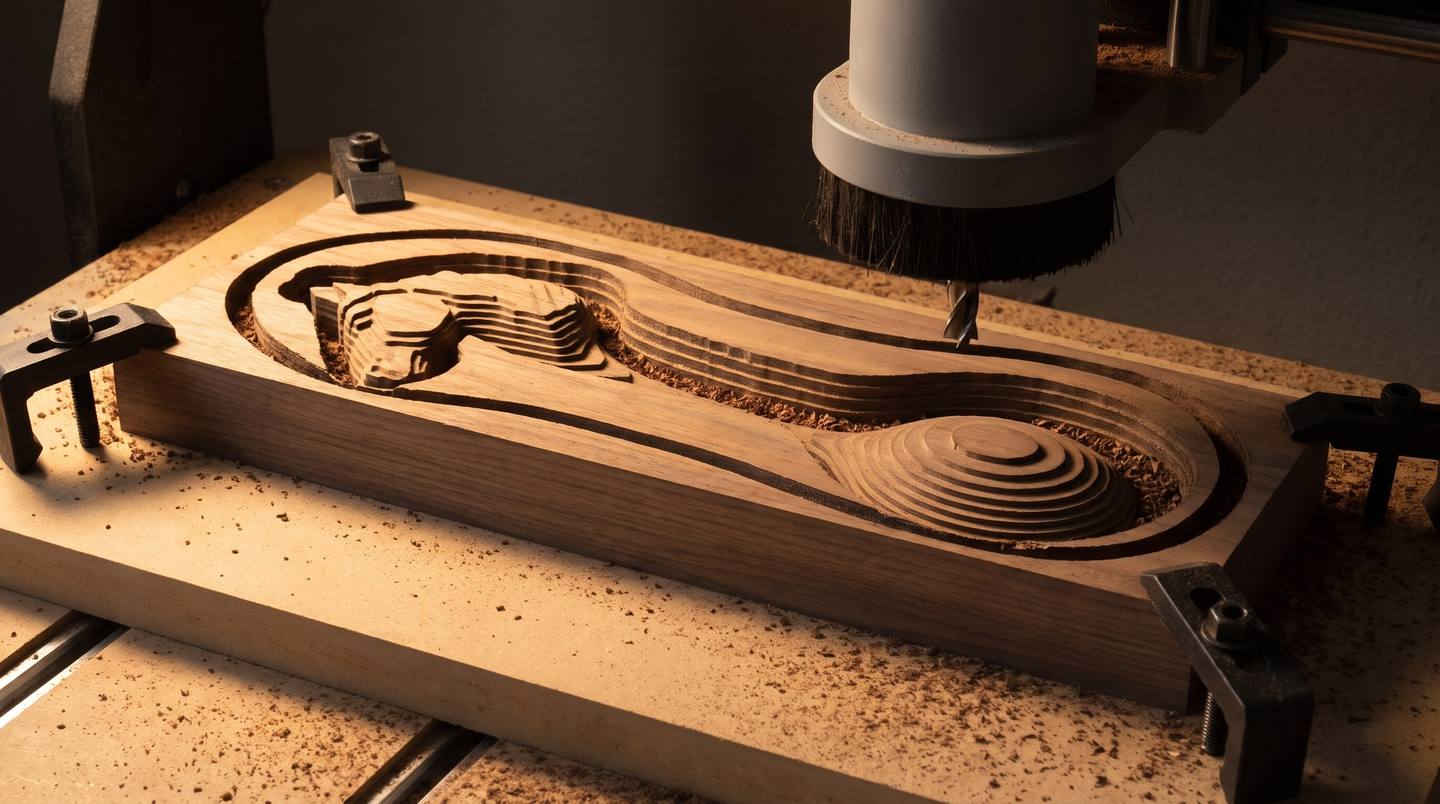
1. 3D roughing with the flat end mill
The 1/4 in flat end mill clears the bulk of the waste in flat layers, so the part stands up as a stepped shape, and cuts the channel down to the parting plane. Starting values from the mustang guide: stepdown 1.6 mm in hardwood (3.2 mm in softwood), stepover 40 percent (2.5 mm), and leave a 0.5 mm allowance for the finishing pass. An up-cut bit clears chips best in a deep slot; a down-cut or compression bit gives cleaner top edges.
2. 3D finishing with a tapered ball nose
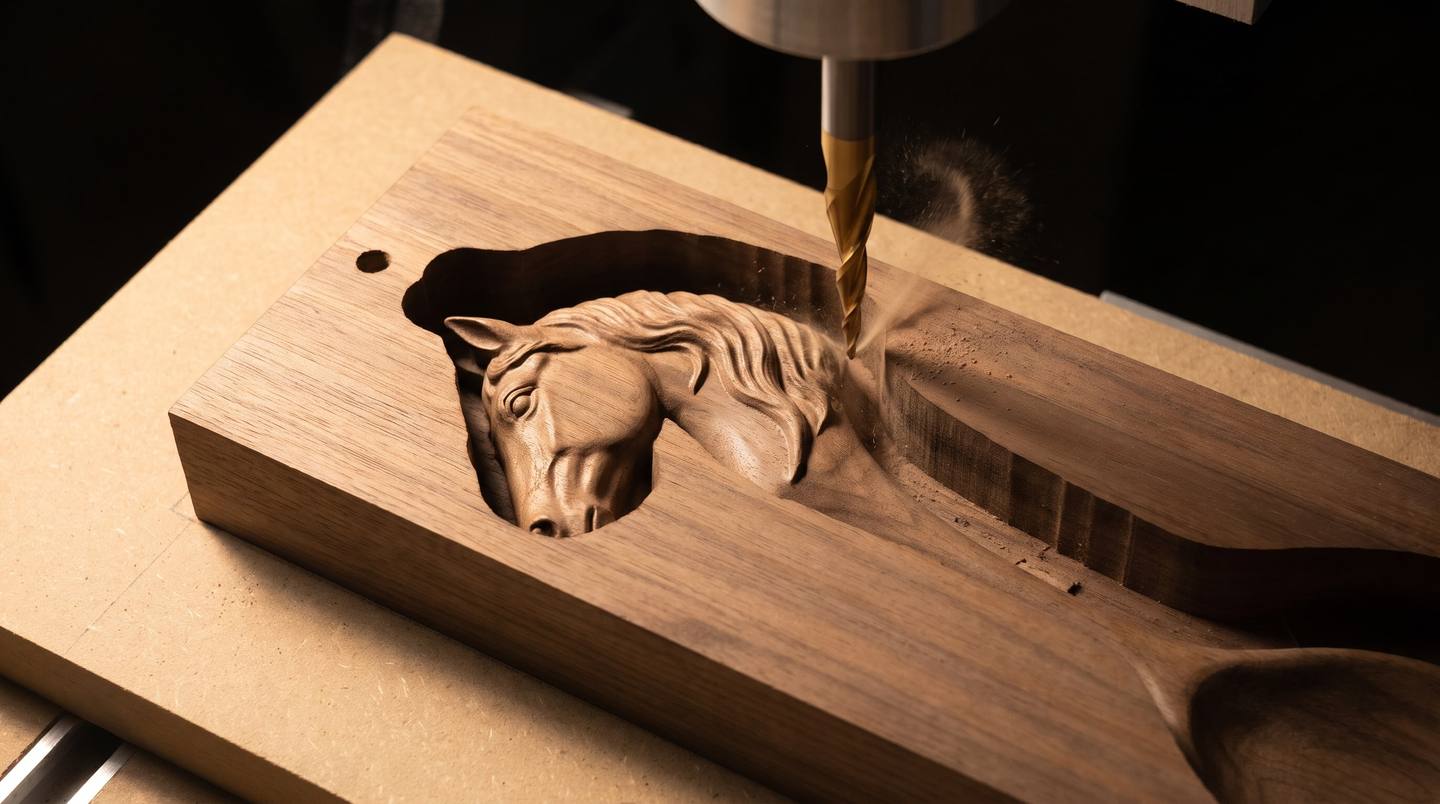
The finishing pass follows the real surface with a ball nose. On a two-sided spoon the finishing bit has two jobs at once: a tip small enough for the detail, and a reach long enough for the depth. A tapered ball nose does both: a fine tip on a cone that gets stiffer as it goes deeper. The mustang guide picks the 1/16 in tip because of how much wood each size would leave in the tight corners:
| Ball nose | Side A: area left more than 0.25 mm proud | Side B |
|---|---|---|
| 1/4 in (6.35 mm) | 9.75 cm² (8.8%) | 8.24 cm² (7.4%) |
| 1/8 in (3.18 mm) | 4.75 cm² (4.3%) | 4.42 cm² (4.0%) |
| 1/16 in (1.59 mm), chosen | 0.56 cm² (0.5%) | 0.85 cm² (0.8%) |
Stepover 0.35 mm, which is 22 percent of the tip and leaves ridges about 0.02 mm high, small enough to oil straight off the machine. Run the raster along the grain, then optionally a second pass across it. More on why that matters in our stepover guide and our tapered ball nose guide.
Feeds and speeds, as a starting point
| Tool | Feed, hardwood / softwood | Plunge, hardwood / softwood |
|---|---|---|
| T1 flat end mill | 900 / 1440 mm/min | 300 / 480 mm/min |
| T2 tapered ball nose | 540 / 810 mm/min | 180 / 270 mm/min |
| T3 drill (peck 3 / 4 mm) | n/a | 400 / 600 mm/min |
At 18,000 rpm with 2-flute bits, already halved for T1 and T2 because of the long stick-out. Listen to the cut and adjust: chatter means slow down or take a smaller stepdown, burning means feed faster or drop the rpm.
The whole job, step by step
This is the run order from the mustang's setup card. It is the same for every two-sided job; only the numbers change.
Side A
- Mount the stock face A up on the jig board, its lower-left corner to the machine's front-left. Clamp only in the outer 10 mm frame, outside every toolpath.
- Set XY zero (stock centre for the default files) and write it down.
- Set Z zero on the top of the stock.
- Drill the two dowel holes with T3, through the stock and 10 mm into the jig board.
- Rough side A with T1, inside the clearance boundary.
- Finish side A with T2, inside the clearance boundary.
The flip
- Clean up. Vacuum every chip out of the channel and off the jig board. A single chip under the board tilts side B.
- Unclamp and lift the board off.
- Put the two steel pins in the jig board's holes.
- Turn the board over on the flip line: for our files, the front edge over to the back. The pencil A is now face down.
- Drop it onto the pins, holes over pins, and press it flat. It should go down with no gap and no forcing.
- Clamp in the outer frame again, below the collet-nut clearance.
Side B
- Re-zero Z only, on the new top (face B). Do not touch X or Y.
- Rough side B with T1. The channel breaks through to meet side A's, and the part now hangs on its tabs.
- Stop and check the tabs. Press the part; nothing should move.
- Finish side B with T2.
- Off the machine: cut the tabs, sand, finish.
How to check the alignment
Before the good wood, run a registration test on scrap of the same size. Our packs include it as two small vector files: on side A, drill the two dowel holes, cut a 6 mm circle right through and engrave a cross 1 mm deep; flip onto the pins, re-zero Z, and engrave side B's cross. If side B's cross sits exactly round the through hole, your pins, flip and zero are right. It takes about 10 minutes and it is the cheapest insurance in woodworking.
On the real job, the first side B roughing pass tells you too: the channel should run straight down into side A's channel with no step in its wall.
Tabs off, sanding and food-safe finish
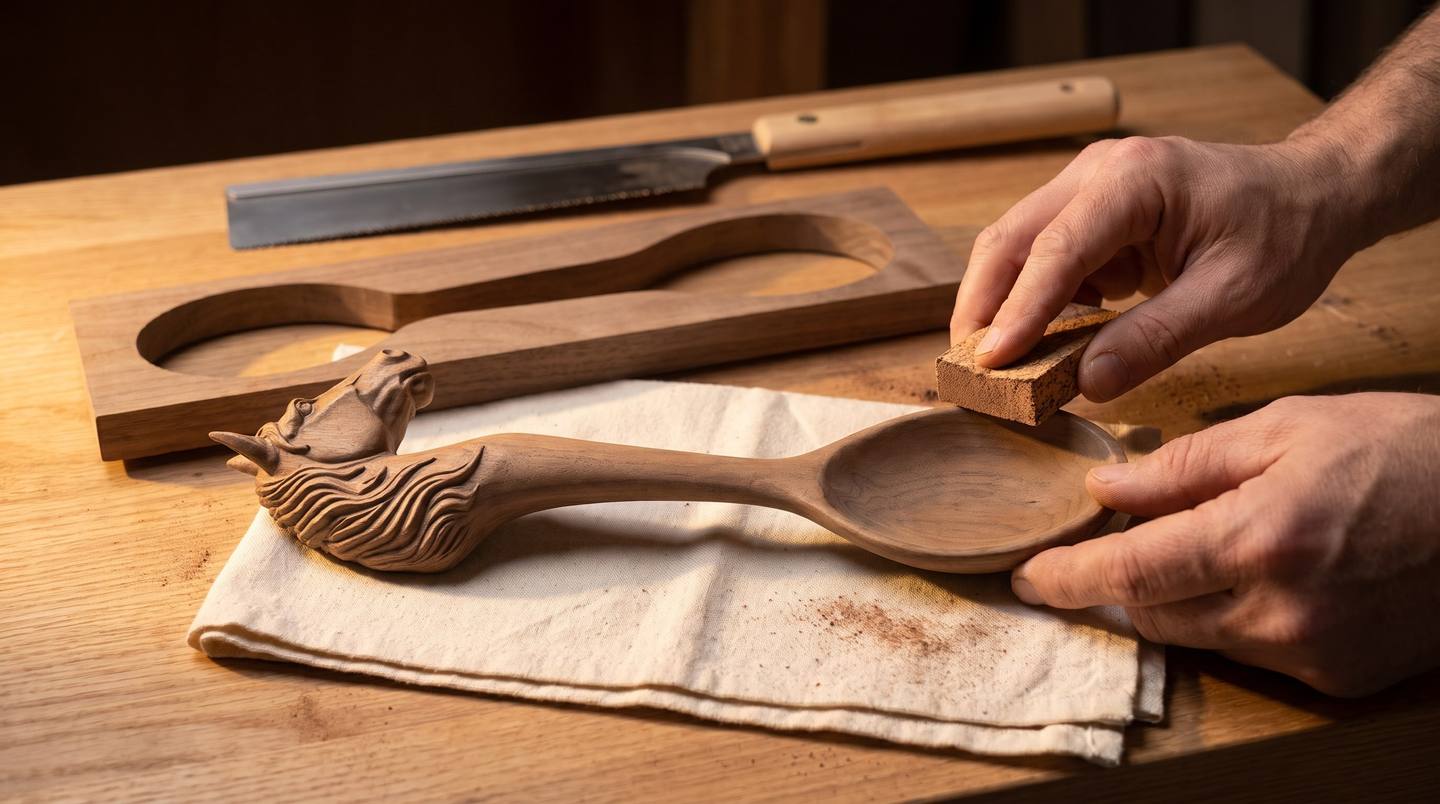
- Cut the tabs off the machine, never with the bit. Hold the frame in a vice or on a bench hook and cut each tab with a fine flush-cut saw, the saw moving away from your hand.
- Pare and sand the stubs flush with a chisel and a sanding block. Because the tabs sit on plain surfaces, this is quick.
- Blend the parting line where the two sides meet, if your machine left a hair of a seam. A flap wheel or a sanding sponge follows the curves.
- Raise the grain on kitchen pieces: wipe with a damp cloth, let it dry, sand again lightly with 220 grit. Otherwise the first wash leaves the spoon fuzzy.
Food-safe finishes
For spoons and anything that touches food, use a finish that is safe once applied: food-grade mineral oil, a mineral oil and beeswax blend (often sold as spoon butter or board cream), or a pure tung oil or polymerised linseed oil that has fully cured. Flood it on, let it soak, wipe off the excess, and re-oil when the wood looks dry. Skip film finishes on the bowl: they chip in use. Decorative pieces can take anything in our finishing guide.

Common mistakes and fixes
| What you see | Cause | Fix |
|---|---|---|
| Side B is shifted from side A: a step along the seam | XY re-zeroed after the flip, loose pins, or holes not drilled through into the jig | Never re-zero XY. Snug pins. Drill through the stock and into the jig on side A. |
| Side B is a mirror image | Board turned the wrong way, or a pre-flipped side B file in software that flips by itself | Flip as the drawing says. In two-sided software use the one model, never a side B file. |
| A ledge or a thin web where the sides meet | The board is not the thickness the CAM thinks | Measure; enter the real thickness; keep the model centred. |
| The bit cannot reach the bottom, or the collet rubs | Flute or stick-out too short | Check flute and stick-out against the setup card before you start; use a longer bit or a tapered ball nose. |
| Tabs break during side B | Too few or too thin tabs, heavy part, softwood | More or thicker tabs; slower finishing; support the part before the last pass. |
| Tab stubs on the carving leave scars | Tabs placed on detail | Move tabs to the handle, rim or any smooth face. |
| Tear-out on top edges and at the tabs | Up-cut bit, cross-grain fibres, a dull bit | Down-cut or compression bit for the last passes; sharp bits; grain along the length. |
| Chatter on deep walls | Long stick-out | Shortest bit that reaches, smaller stepdown, the reduced feeds. |
| A spot of wood left in a tight gap | An undercut: no side can reach it | Clear it with a knife or rotary tool, or choose a design without one (next section). |
Designing for two sides
A 3-axis bit only reaches what it can see from straight above on side A, or straight below on side B. Anything hidden from both directions is an undercut: the machine leaves it as solid wood. Most of good two-sided design is avoiding them.
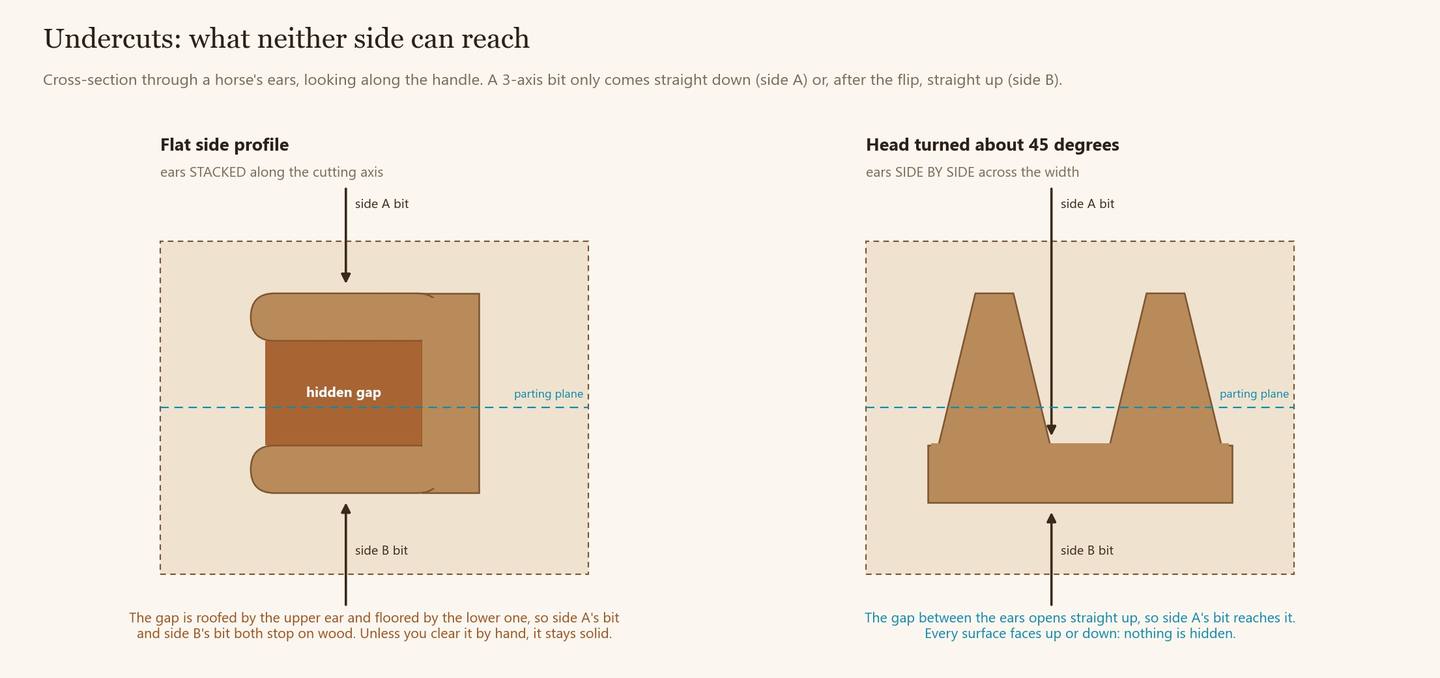
Our first animal-head spoons were drawn as flat side profiles: the head in pure profile, so the two ears, the jaw gap and any antlers sat one above the other along the cutting axis. The gaps between them could not be reached. We measure that on every design now, as the area that neither side can reach, seen from above. The rules we adopted from that:
- Turn heads about 45 degrees, three-quarter view, so paired parts like ears sit side by side across the width instead of stacked.
- Every gap opens to the front or the back. No tunnels, no overhangs.
- Keep thin parts at least 4 mm thick, so they survive the bit and the tabs.
- Keep the block 60 mm thick or less, so the bits stay short enough to be stiff.
- Smooth surfaces where food goes: a spoon bowl is a plain dish, cut from one side.
- Gate on undercut. We aim for under 1 cm² on a spoon and none in the face or ears.
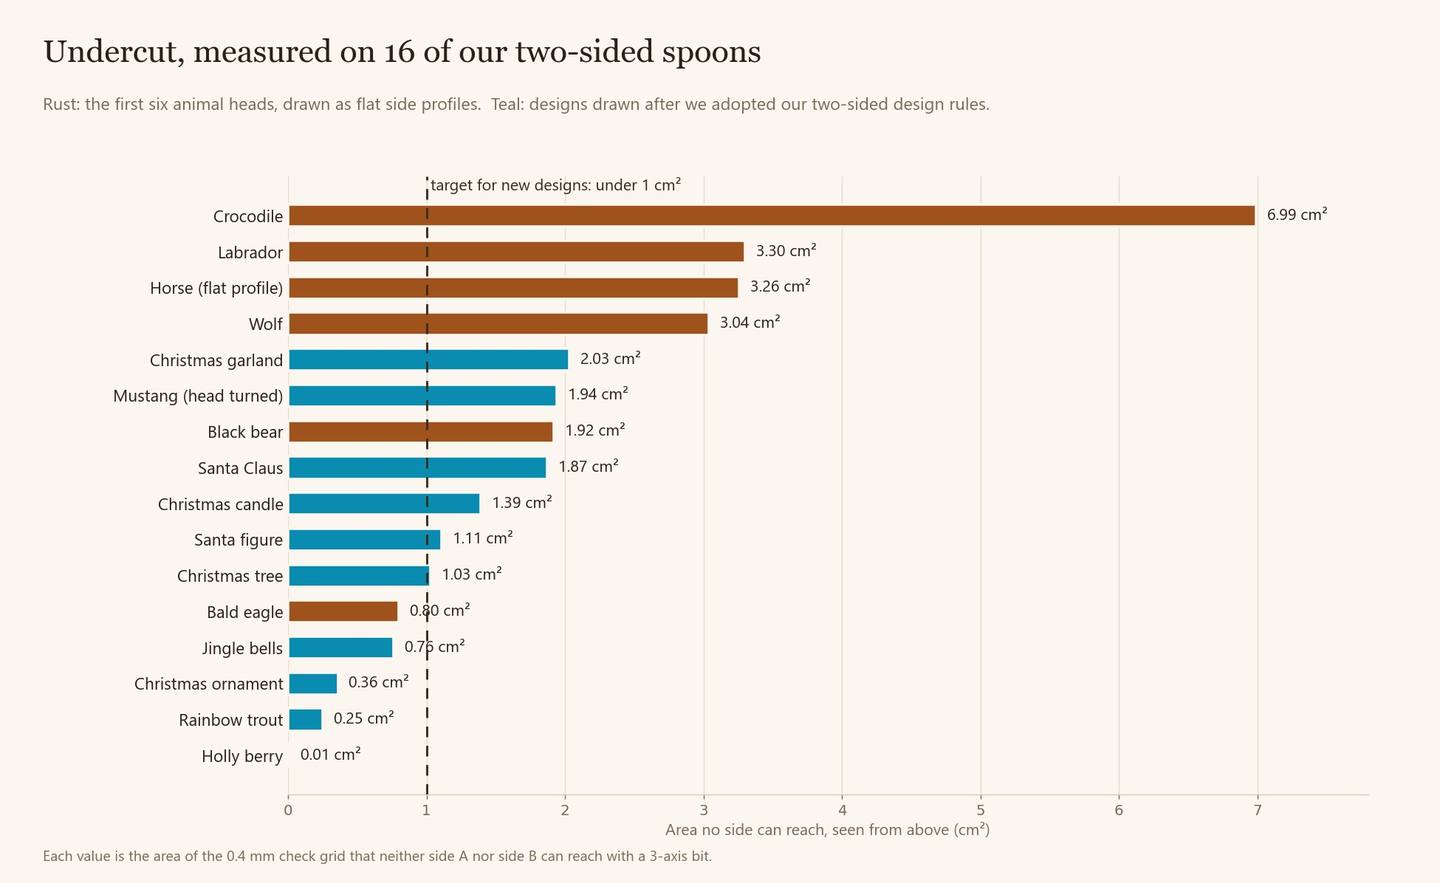
The honest note: under 1 cm² is a target, not a promise, and several designs above it are still for sale. On a spoon, a small undercut usually sits in the deepest crease of a mane or behind an ear; the finishing pass blends round it and a minute with a knife or a rotary burr cleans it up. If you want a design you can take straight from the machine to oil, pick one from the low end of that chart.
What our two-sided files give you
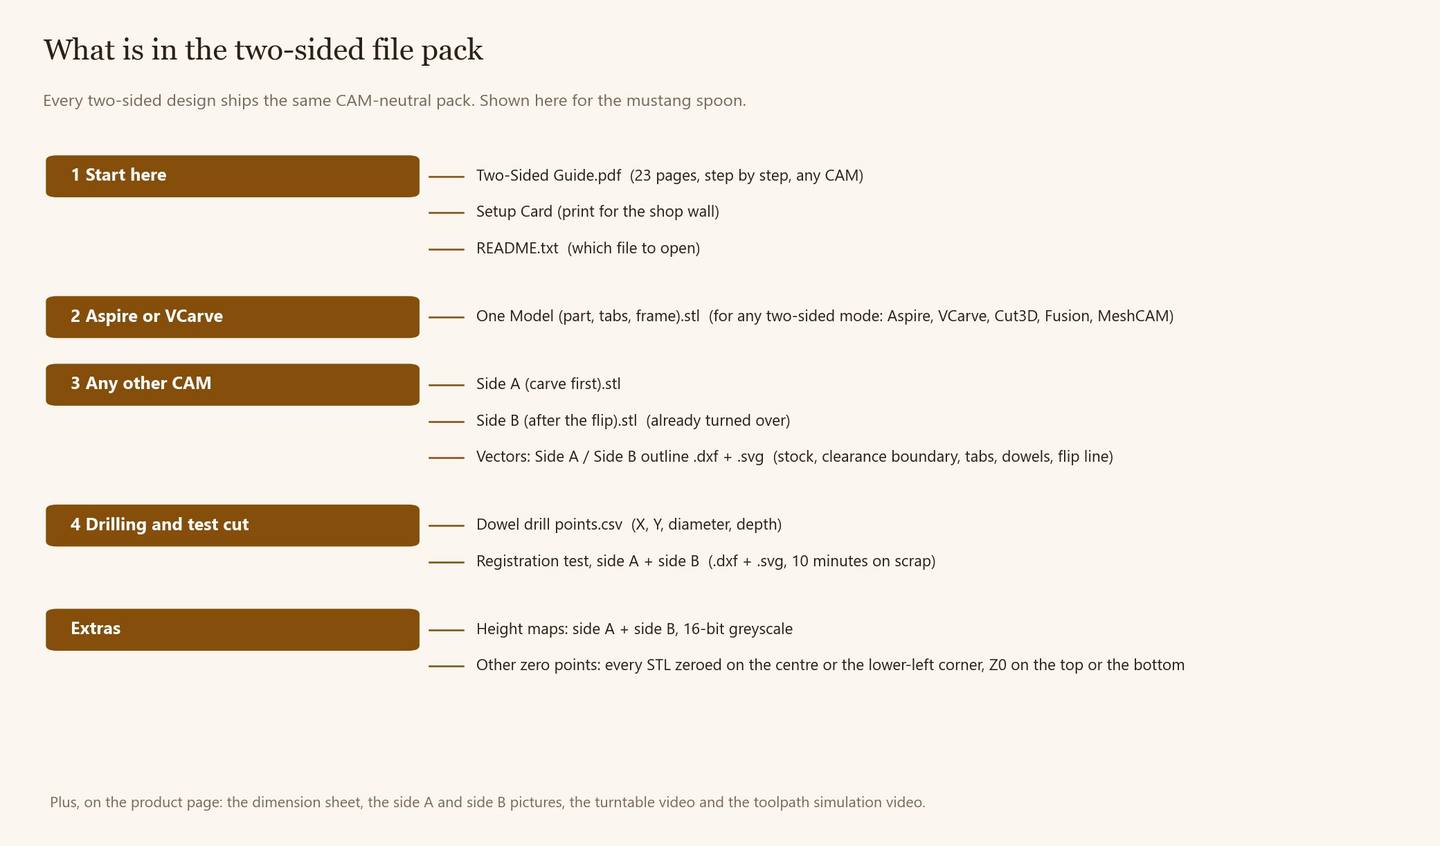
Everything above is the theory. Our two-sided files are built so you do not have to work any of it out yourself. Every design ships the same CAM-neutral pack, prepared and checked for that exact model.
The models
- One Model (part, tabs, frame). The whole job as one STL: the full 3D spoon, its tabs and the surrounding frame, already placed in the exact blank size. This is the file for software with a two-sided mode (Aspire, VCarve, Cut3D, Fusion, MeshCAM): import it once and let the software turn it over.
- Side A and Side B. The same job split at the parting plane, side B already turned over as the board lies after the flip, for any program without a flip feature: Carveco, Easel Pro, Carbide Create Pro and the rest. Two plain one-sided jobs.
- Four zero points. Every STL comes zeroed on the stock centre or its lower-left corner, with Z0 on the top or the bottom, so the file matches how you already zero your machine.
- Height maps for side A and side B, 16-bit greyscale, for height-map CAM.
The vectors and drilling files
- Outline vectors (DXF and SVG) for each side: the stock, the clearance boundary for your 3D toolpaths, the tabs, the dowel holes and the flip line.
- Dowel drill points as a CSV: X, Y, diameter and depth, from the centre and from the corner.
- The registration test, side A and side B, for the 10-minute check on scrap.
The CNC Setup Card
One page for the shop wall: stock size, depth of cut per side, the flip, the dowels, the three tools with the flute, stick-out and overall length each one needs, the nine-step run order, and which file to open.
The step-by-step two-sided machining guide
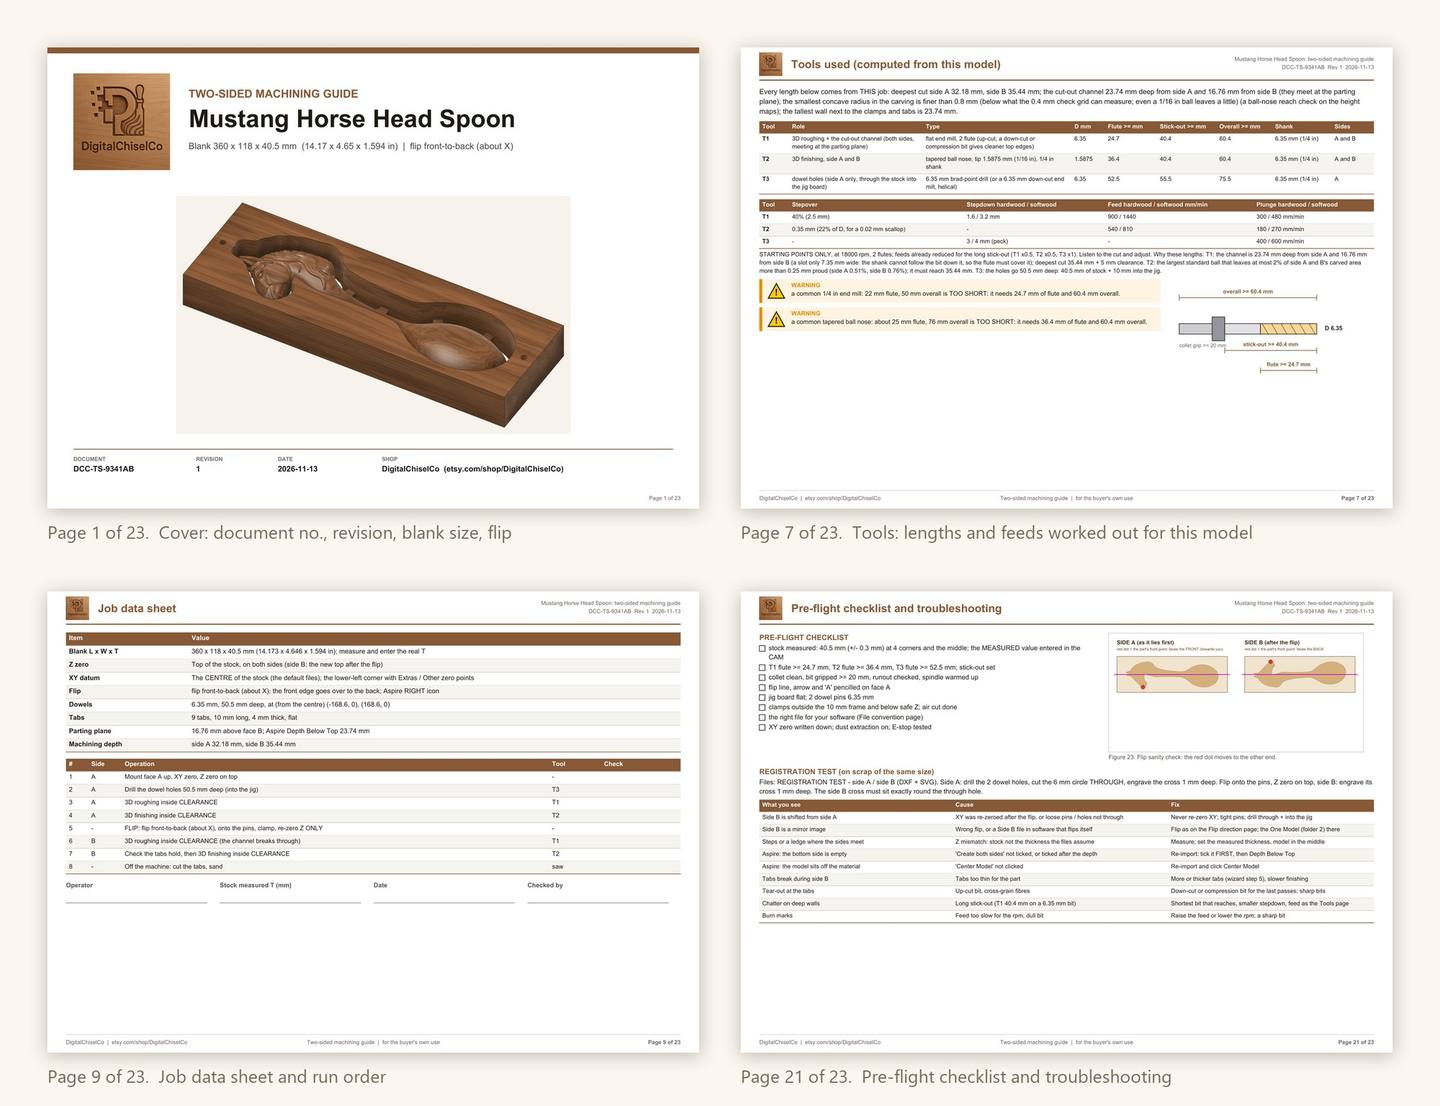
A numbered, dated PDF, 23 pages for the mustang, with a document number and revision like a shop drawing. It covers which file to open in which program, the flip direction, safety, the tools worked out for this model with feeds and the reason for each length, a job data sheet you can fill in, the steps for any software, program-by-program notes for Aspire, VCarve, Cut3D, Fusion, MeshCAM, Carveco, Easel Pro and Carbide Create Pro, annotated Aspire screens for the double-sided setup, a pre-flight checklist and a troubleshooting table.
On the product page
Every two-sided product page also shows the dimension sheet, renders of side A and side B, the part in its frame, the flip drawing, a turntable video of the finished piece and a toolpath simulation video of both sides, so you can see exactly what you are buying before you buy it.
Checked before it ships
Before a pack goes out, every exported file is read back: side A plus side B must give the original part again (within a median of 0.0 mm on the mustang), the dowels in the vectors and the CSV must agree to 0.0 mm and sit on the flip line, and every STL must be closed and in its stated zero point.
The licence
Every file includes a commercial licence: carve and sell as many finished pieces as you like, with no royalty and no credit required. The one thing it does not allow is reselling or sharing the digital file itself. Details are on our licence page.
Questions
Can I do two-sided machining on a 3-axis CNC?
Yes. Two-sided machining is a 3-axis technique: the machine carves the top, you turn the board over on two dowel pins, and it carves what used to be the bottom. No rotary axis is needed. Check that your Z clearance takes the jig board, the blank and your longest bit.
How do I keep side A and side B aligned?
Drill two dowel holes with the machine during side A, through the blank and about 10 mm into a jig board screwed to the spoilboard. Flip the board over the line through the holes, drop it onto steel pins in the jig (the smooth shank of an old 1/4 in drill bit works just as well), and re-zero Z only. Never re-zero X or Y after the flip.
Should I flip along X or along Y?
Either works if the pins sit on the line you turn about and the software is set to the same direction. Flipping about X, front edge over to the back, keeps the long side of the board along the pins and is what our spoon files use.
How long do my bits need to be?
Stick-out at least the deepest cut on either side plus about 5 mm, and flutes long enough to cover any narrow slot. For the mustang spoon in a 40.5 mm board that means a 1/4 in end mill with at least 24.7 mm of flute and 40.4 mm of stick-out, and a tapered ball nose with at least 36.4 mm of flute. Our setup cards list the numbers for each design.
Where should the tabs go?
On plain, smooth surfaces such as a spoon handle or bowl rim, spread round the outline, at the parting plane. Never on carved detail, because the stub has to be sawn and sanded off. We size them at no less than 1 mm² of tab section per gram of part, with at least three tabs.
What is an undercut in two-sided machining?
Any surface that neither the top nor the bottom bit can see, such as the gap between two ears stacked one above the other. The machine leaves it as solid wood. Designs avoid them by turning heads about 45 degrees so paired parts sit side by side.
Which wood and finish are safe for a CNC-carved spoon?
A close-grained, food-safe hardwood such as maple, cherry, beech, birch or walnut, finished with food-grade mineral oil, a mineral oil and beeswax blend, or a fully cured pure tung or polymerised linseed oil.
Which software handles two-sided jobs?
Vectric Aspire and VCarve Pro (Double Sided job), Vectric Cut3D, Autodesk Fusion and MeshCAM all have a two-sided workflow. Carveco, Easel Pro and Carbide Create Pro do not, but run a two-sided job as two one-sided jobs from separate side A and side B files.
The designs
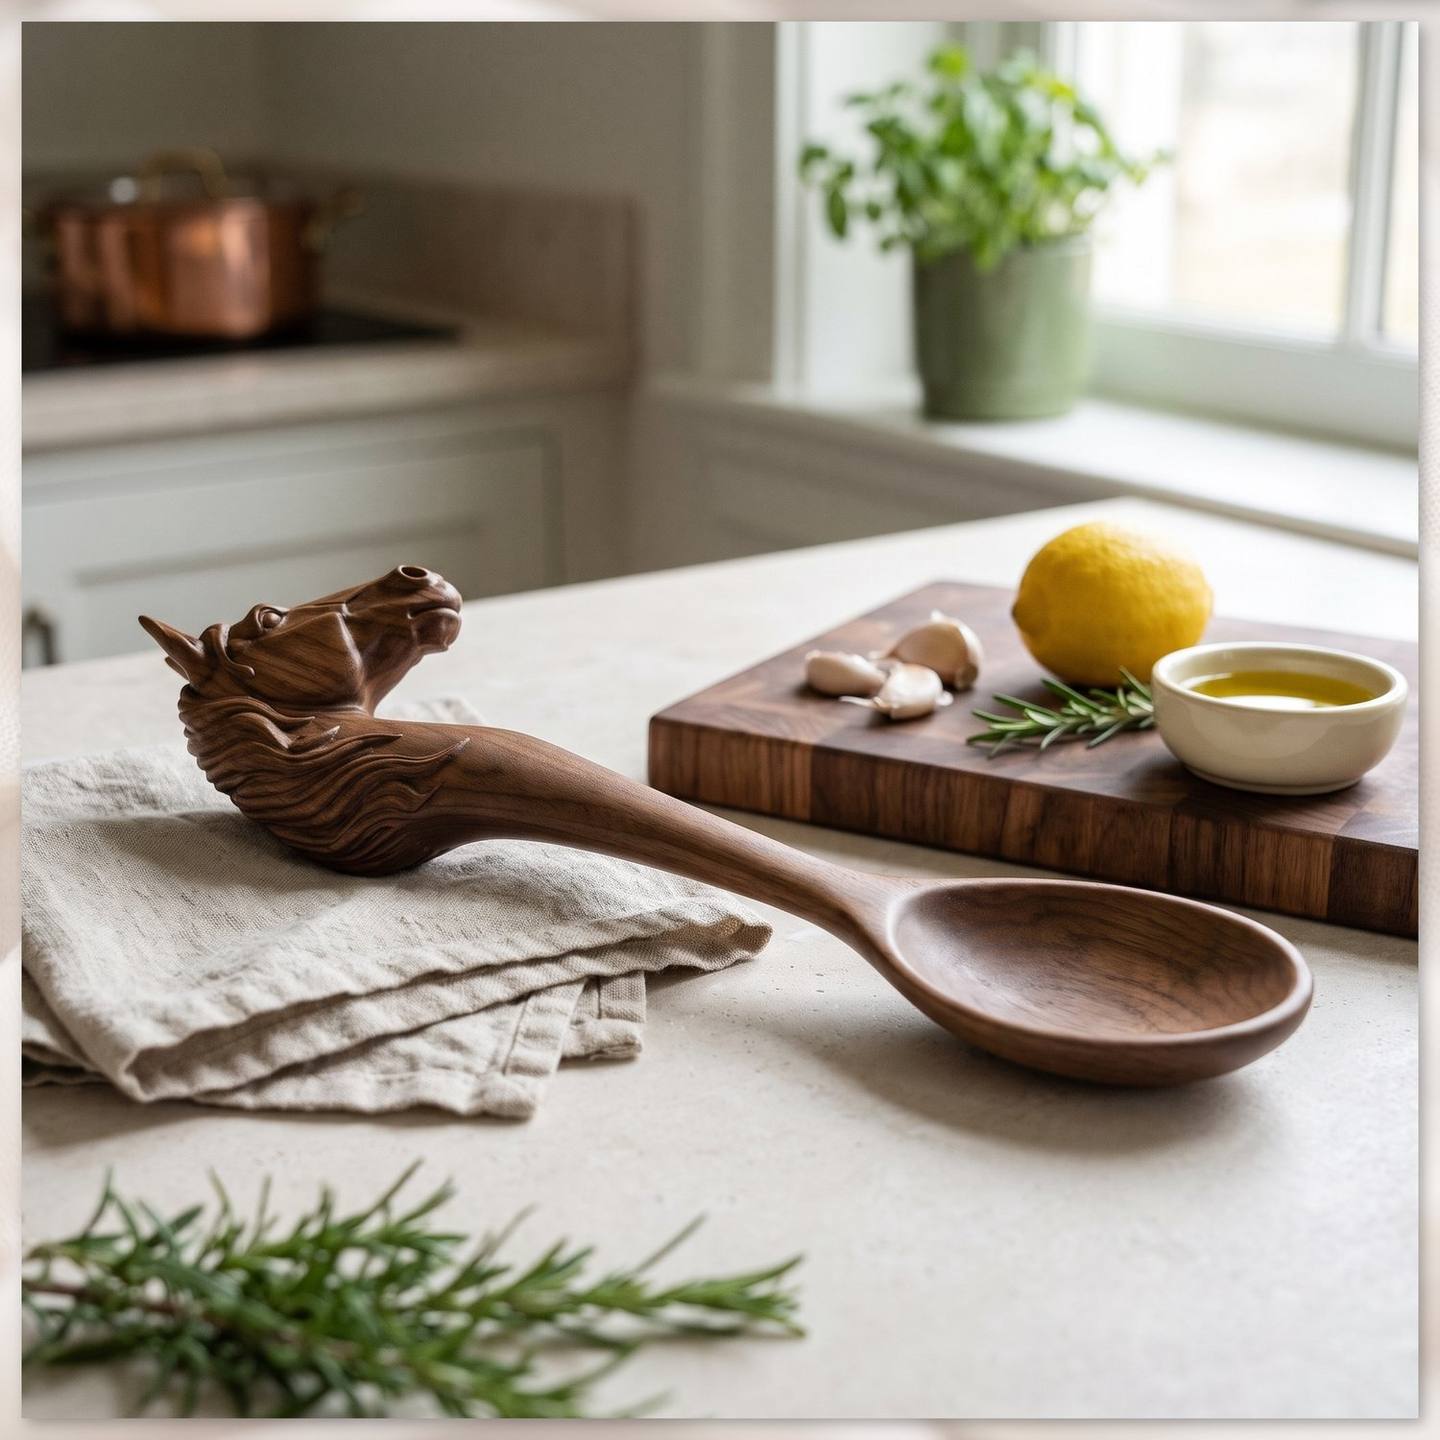
The mustang horse head spoon is the design in every photograph and every number above.
Download the mustang horse head spoon · $6.39
The bundle

Download the 8 animal spoon bundle · $25.56
Single spoons
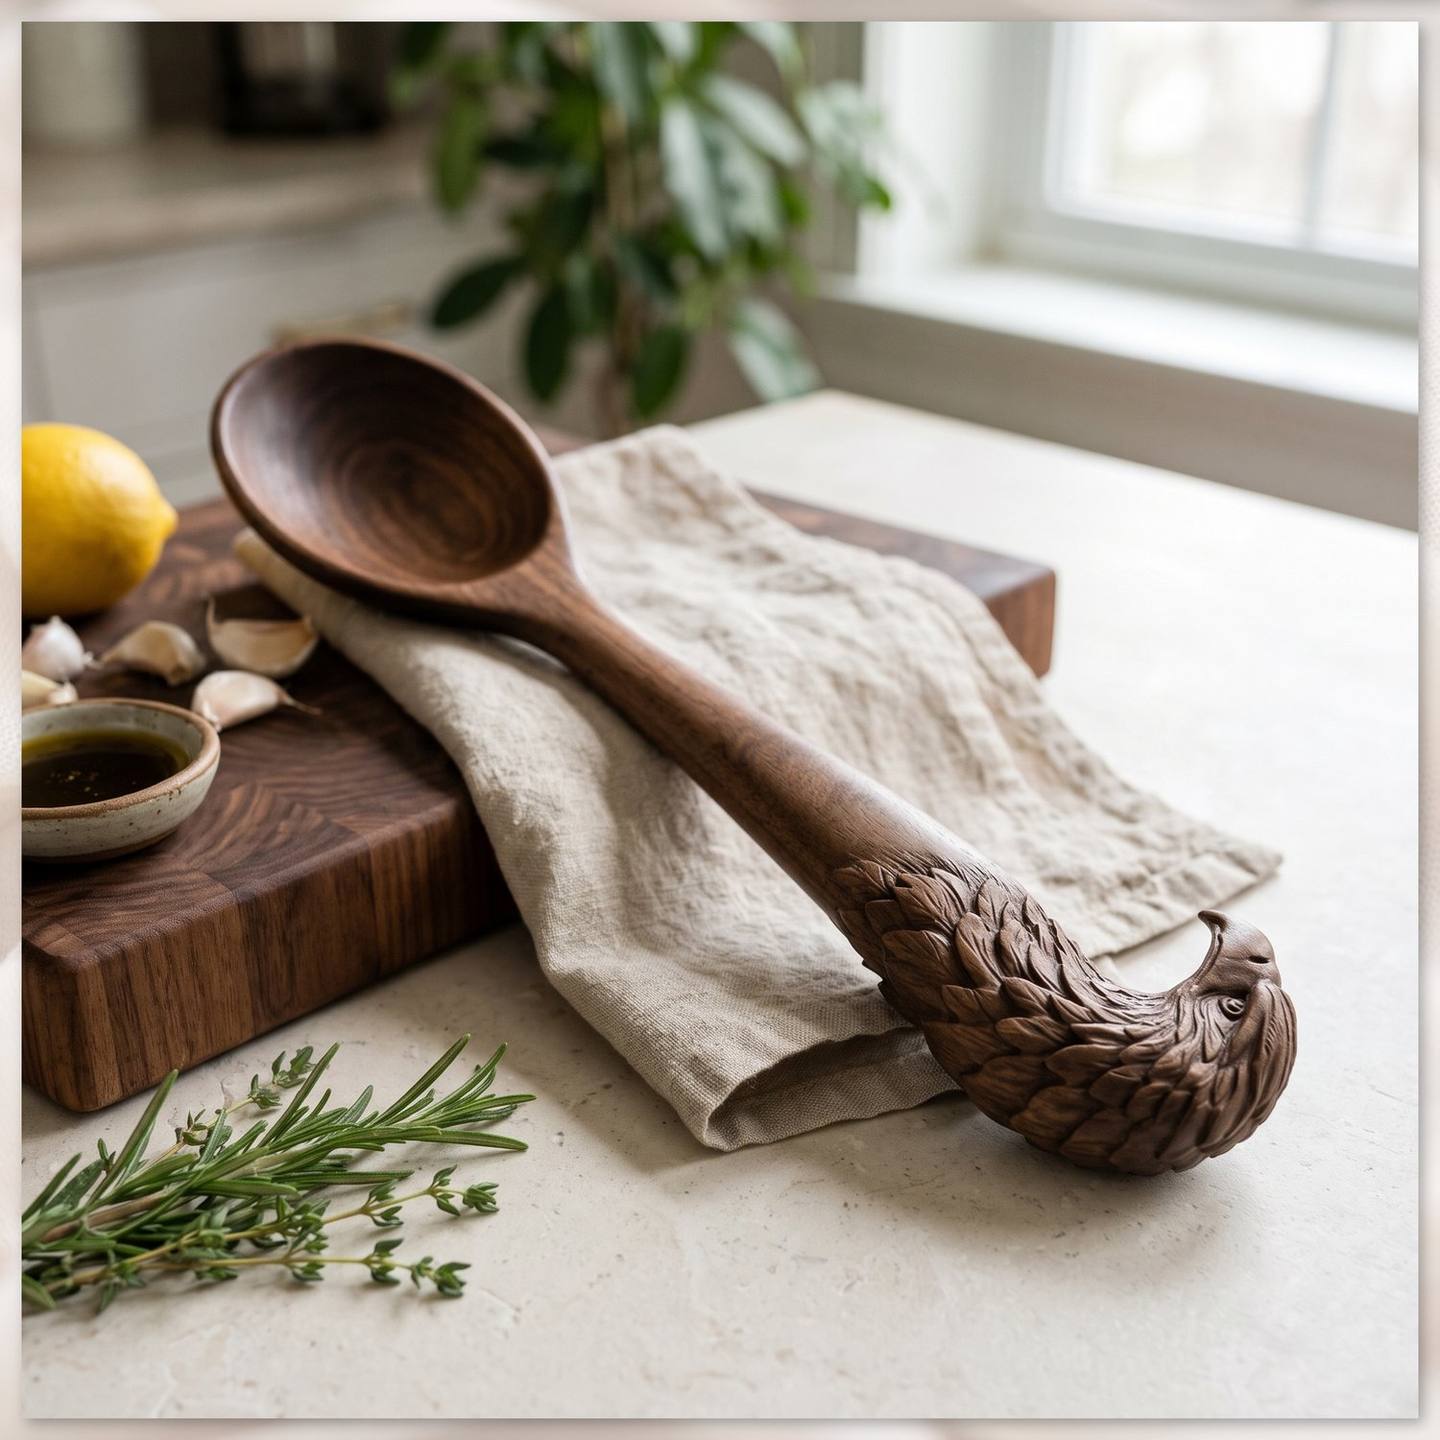 Bald eagle head spoon$6.39 · download
 Black bear head spoon$6.39 · download
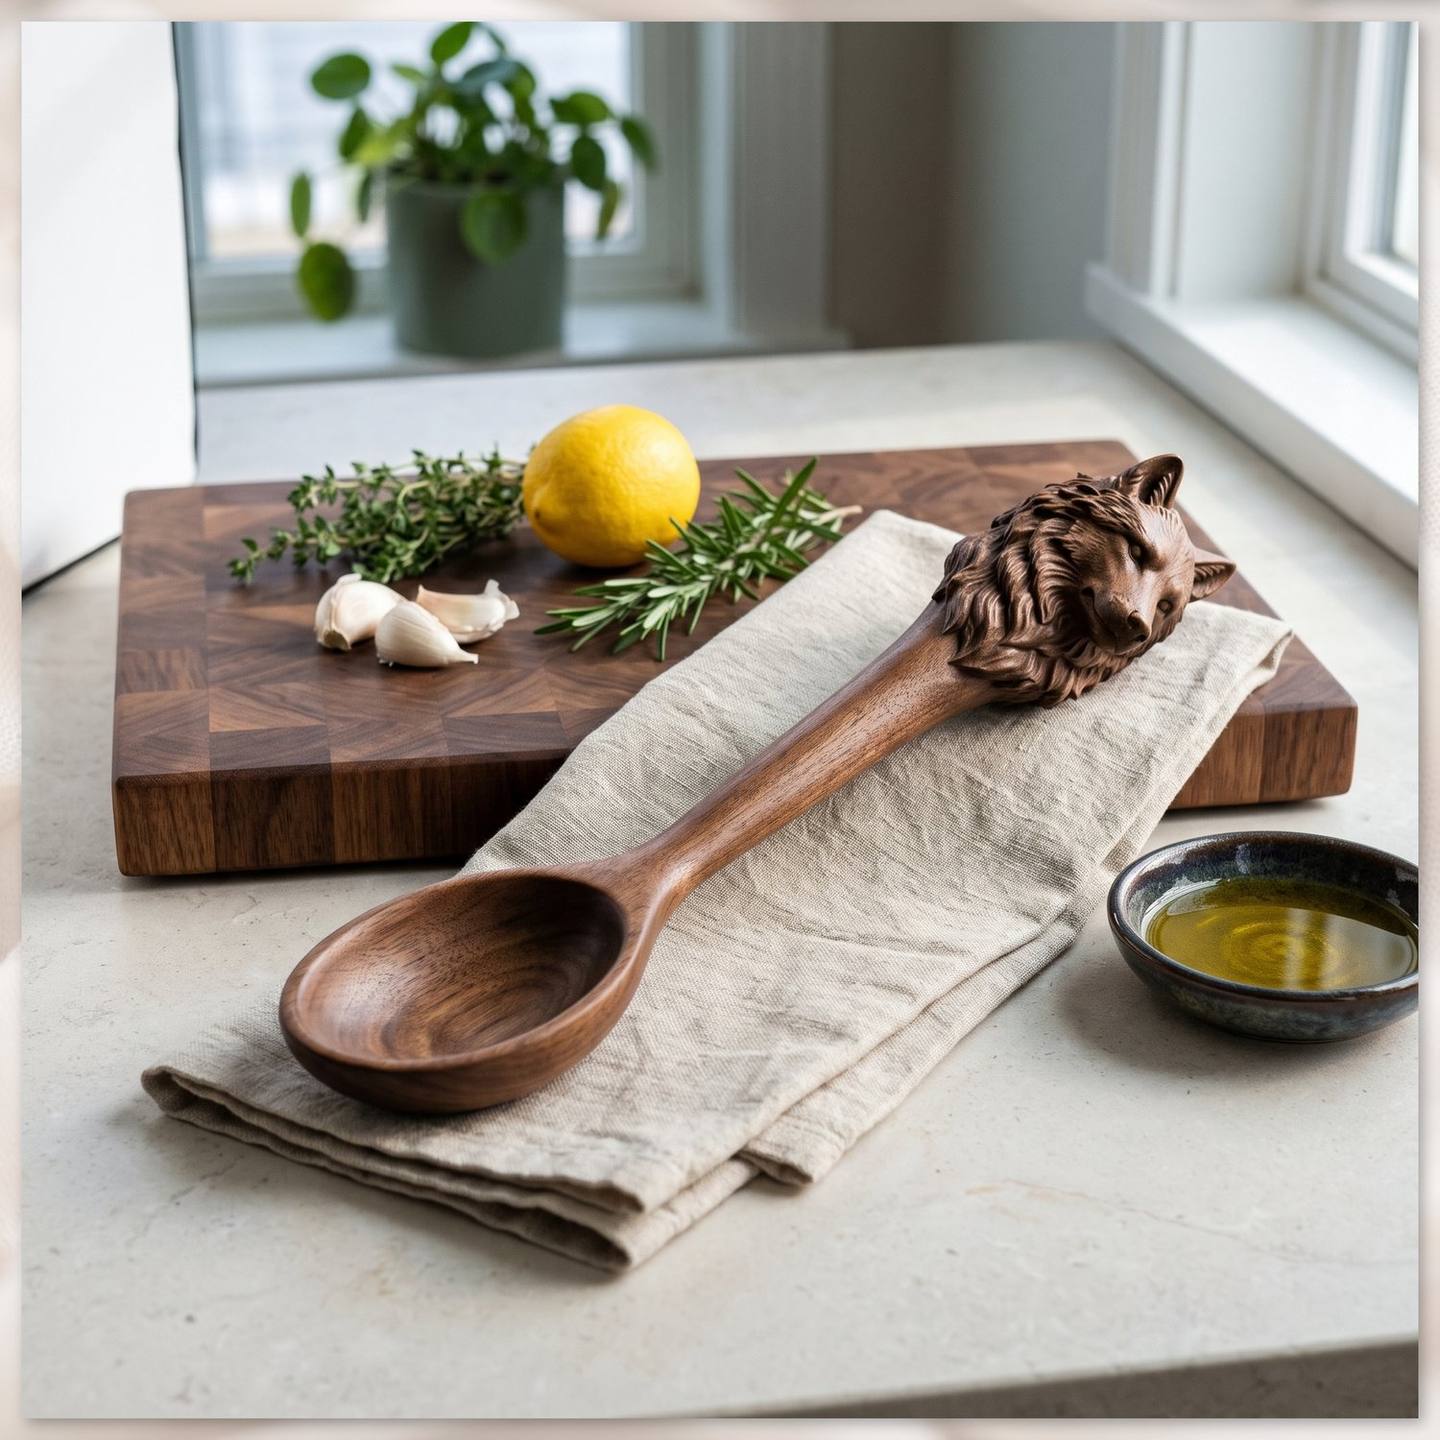 Wolf head spoon$6.39 · download
 Horse head spoon$6.39 · download
 Labrador head spoon$6.39 · download
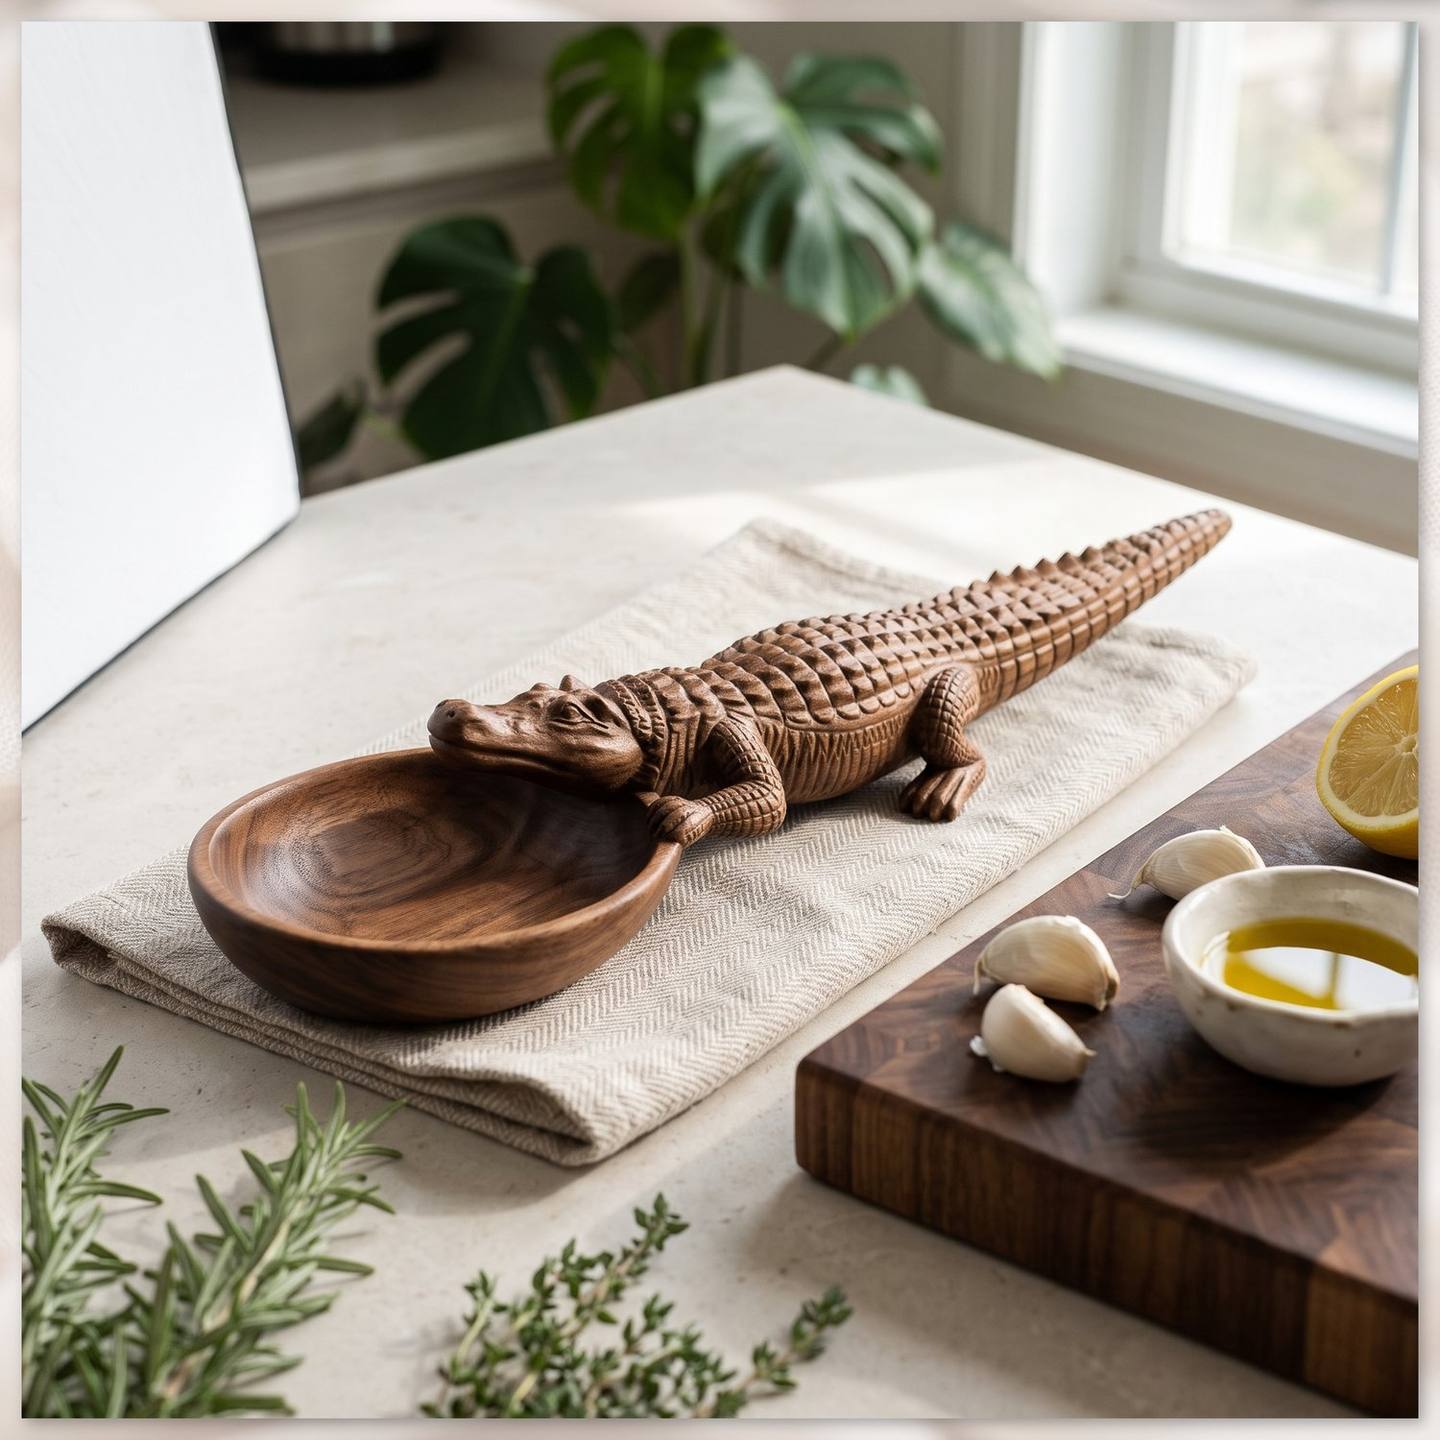 Crocodile spoon$6.39 · download
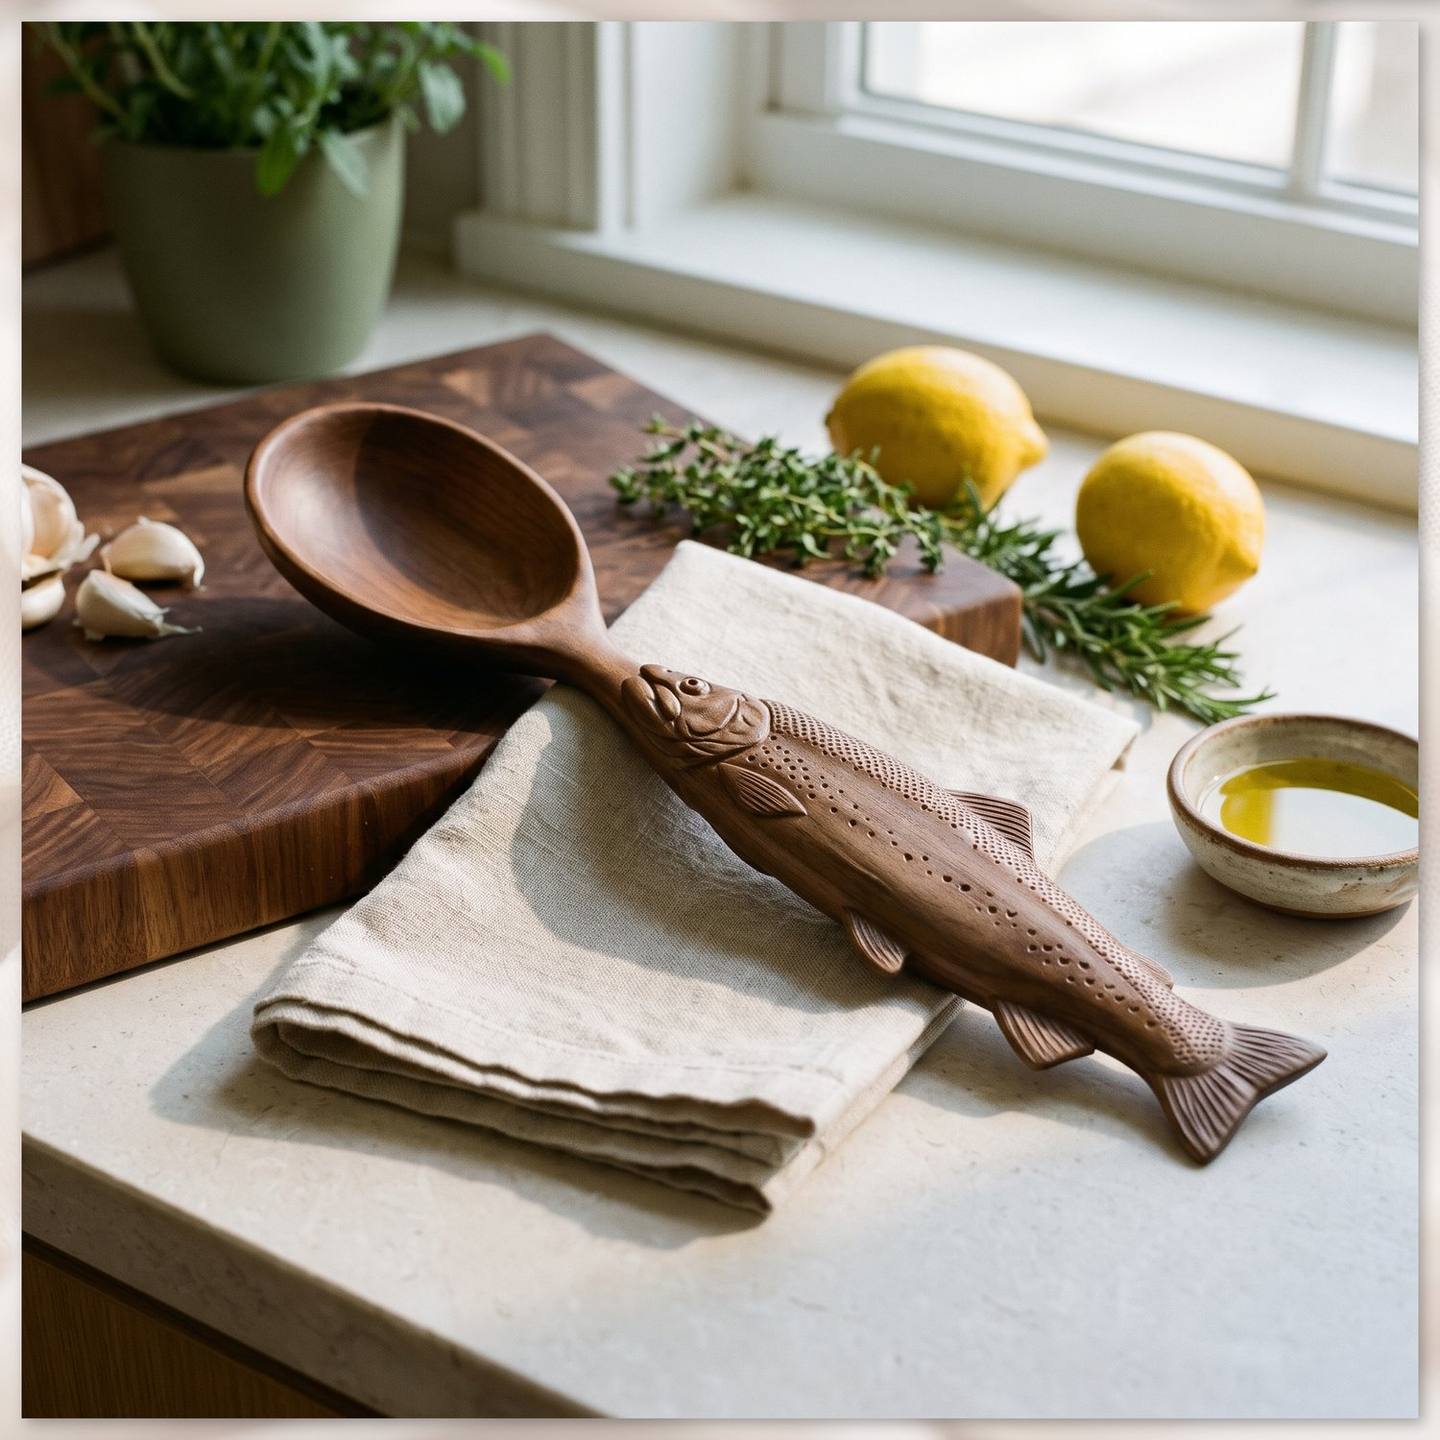 Rainbow trout spoon$6.39 · download
 Santa Claus serving spoon$6.39 · download
 Santa figure double spoon$6.39 · download
 Christmas candle spoon$6.39 · download
 Christmas ornament spoon$6.39 · download
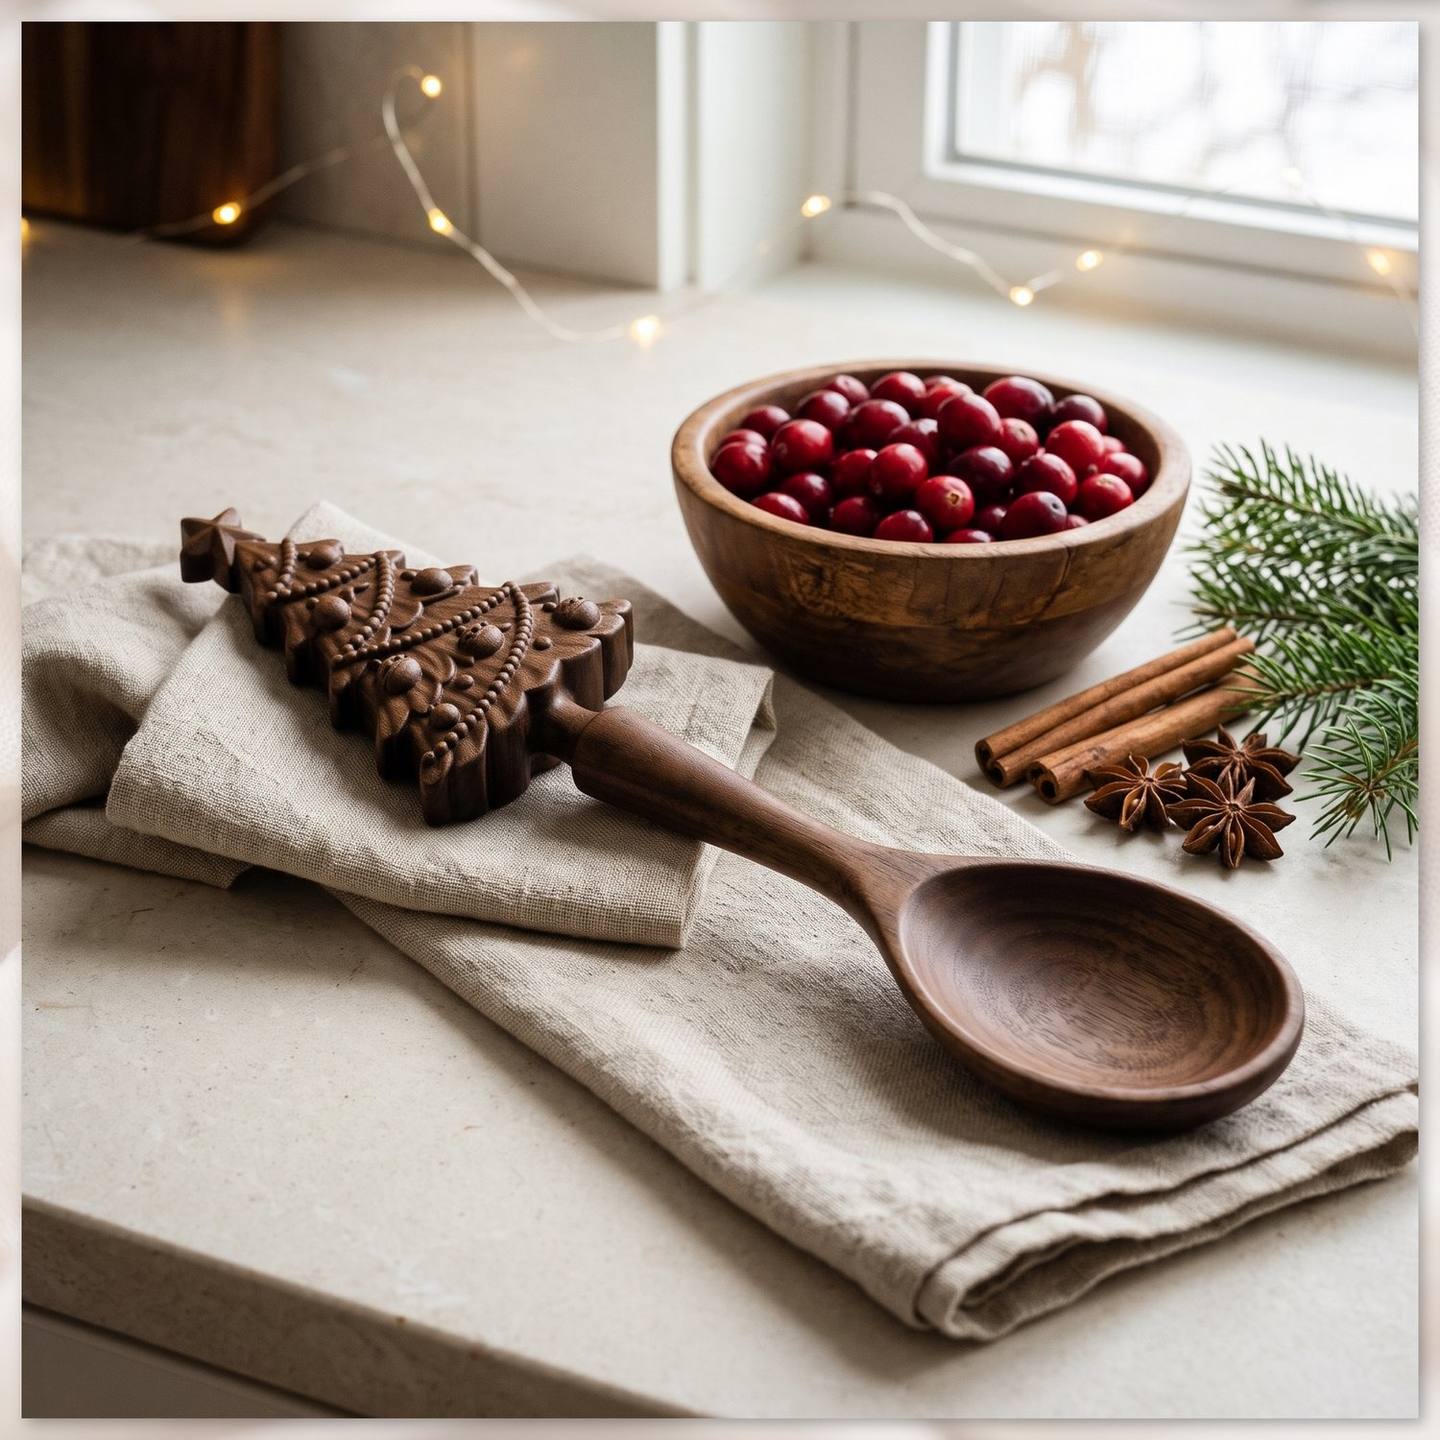 Christmas tree spoon$6.39 · download
 Holly berry spoon$6.39 · download
 Jingle bells spoon$6.39 · download
Every one of them ships with the full pack described above: the one model and the split sides with tabs, four zero points, vectors, dowel points, the registration test, the setup card and the step-by-step guide. Before you cut, our free Will it cut? checker will look at any STL against your machine in your browser.